While the easiest way to install Moodle on your HostPapa server is via the Softaculous Apps Installer, those that require more granular control of installation options can install the software manually. Follow these steps to install Moodle manually on your server.
Download Moodle
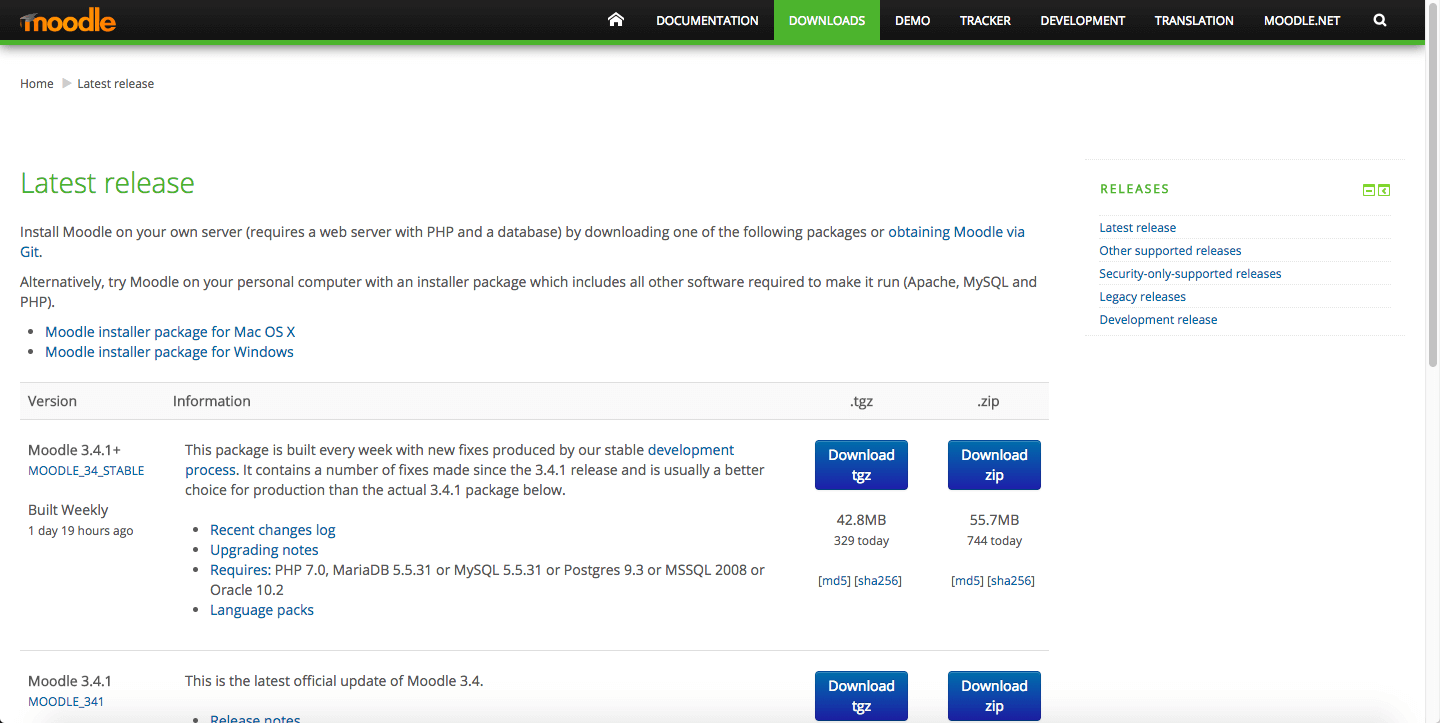
Head to the Moodle website to download the latest release of the software. Select the zip file and then unzip it on your local computer once downloaded.
Create a subdomain if required
Now is a good time to decide where you wish to access Moodle on your server. You can choose to install Moodle in a folder and access the software in your web browser at https://[yoursite.com]/moodle. Alternatively, you can create a subdomain for the software and use https://moodle.[yoursite.com].
Upload the files to your server
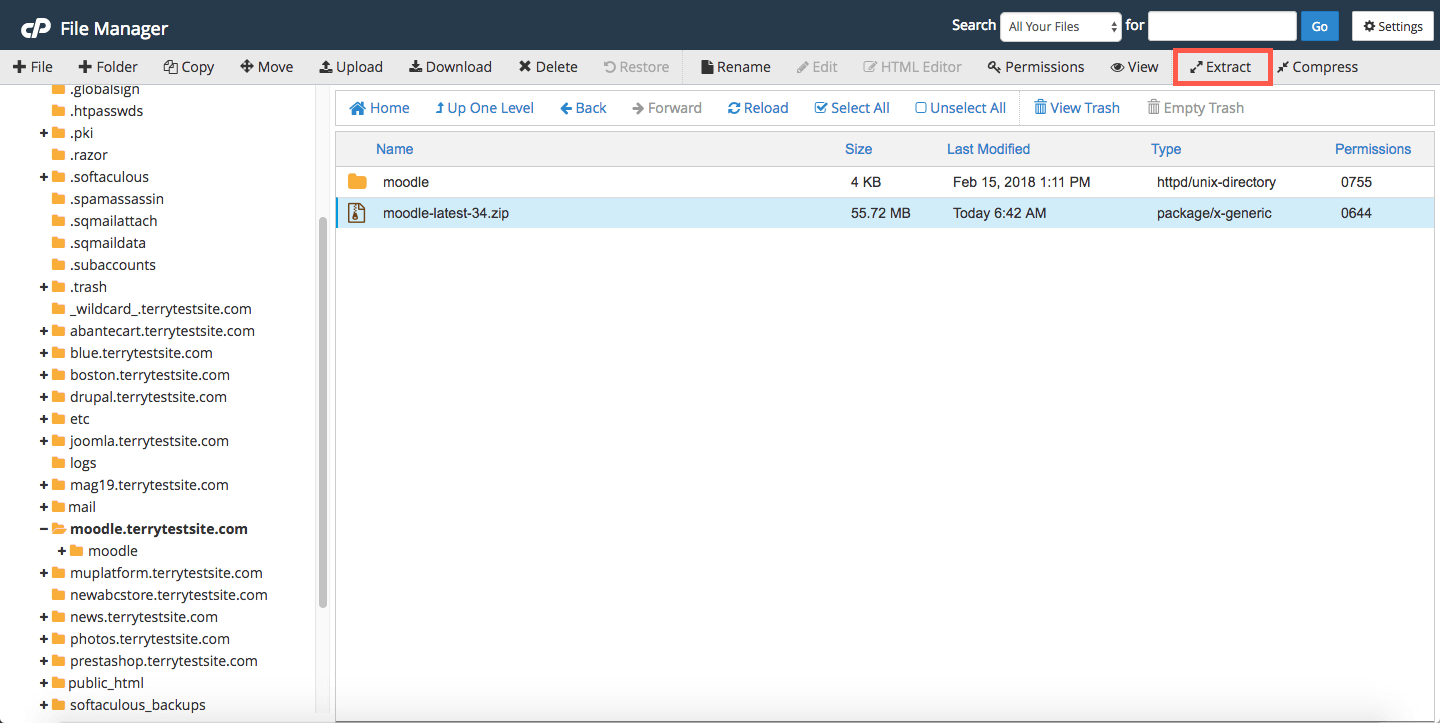
Now upload the Moodle files to your server. You can use an FTP client or cPanel File Manager. If you experience issues uploading the uncompressed files, try uploading the zip file and use cPanel File Manager’s Extract button to unarchive the files.
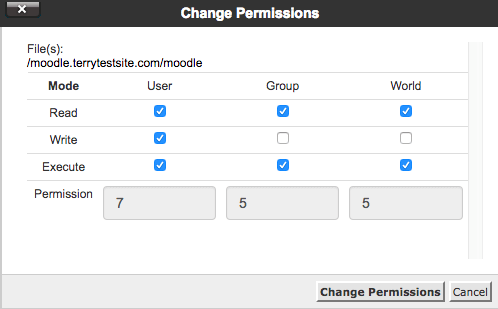
You must secure the files before proceeding. It is vital that the files are not writeable by the web server user. Right-click the Moodle folder and select Change Permissions. Ensure permissions are set to 755.
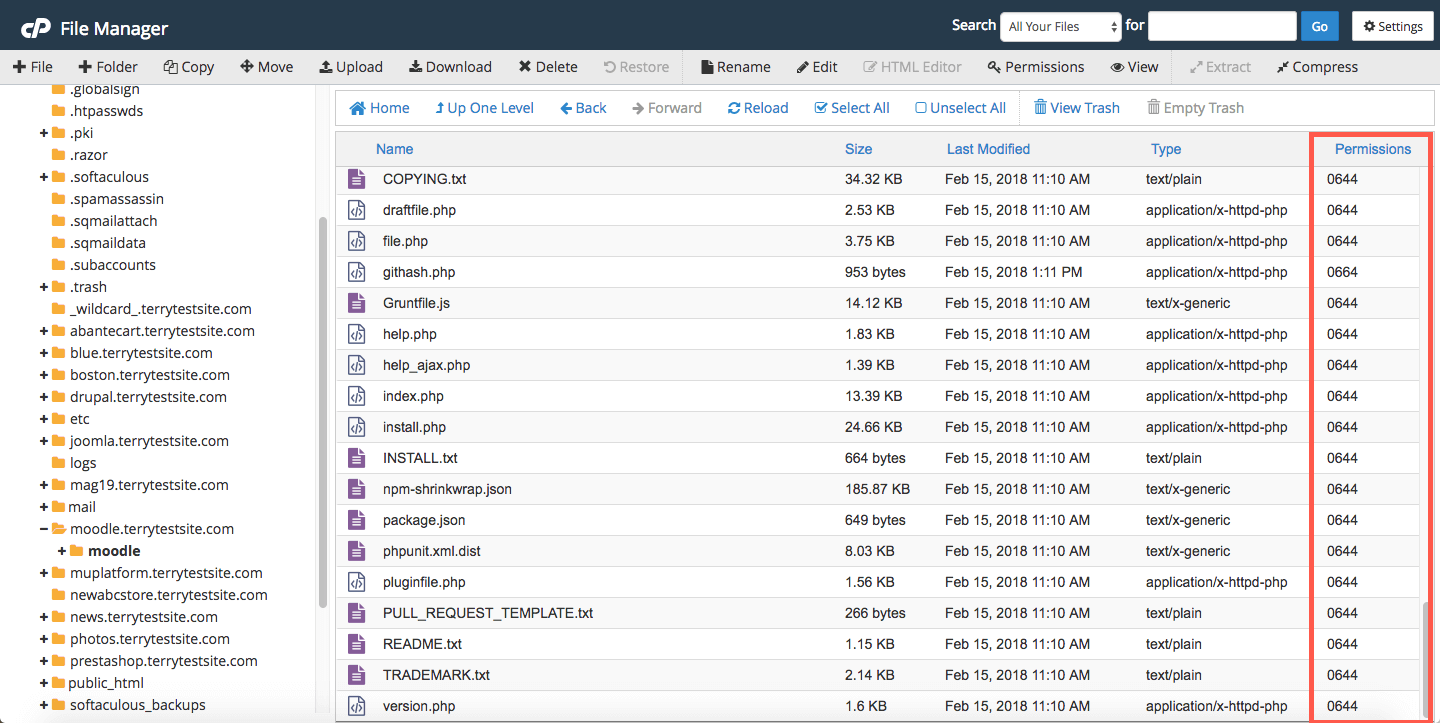
Now enter the Moodle folder and check that the regular files within have permissions set to 0644.
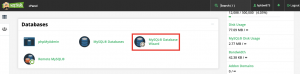
Create an empty database
From the cPanel main menu, select Databases > MySQL Database Wizard.
Follow the wizard steps to create a new database for Moodle. Create the database name, username, and password, then click Create User.
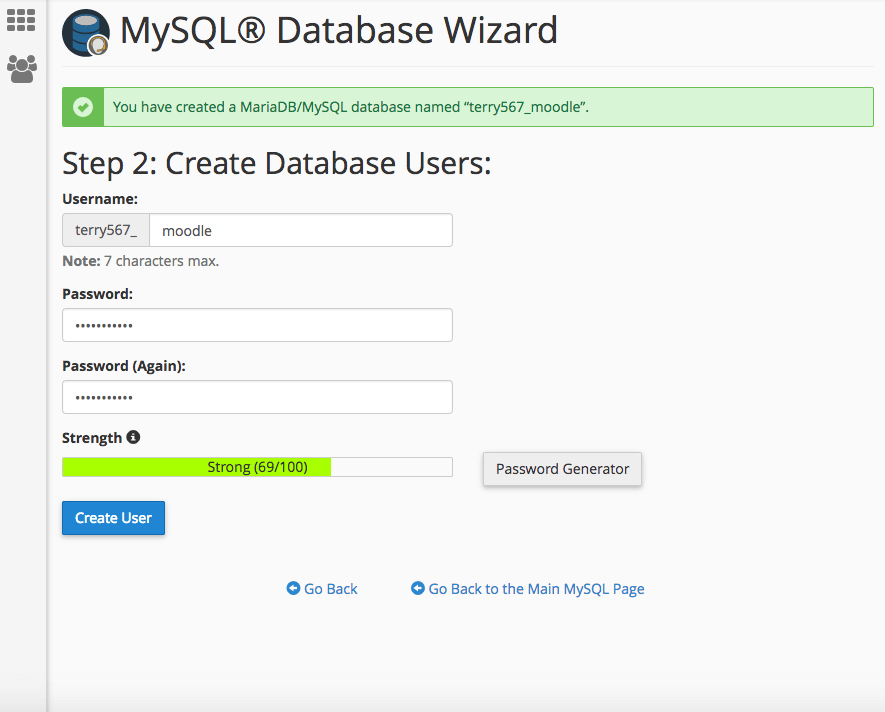
In the next screen, ensure All Privileges are checked and complete the database setup.
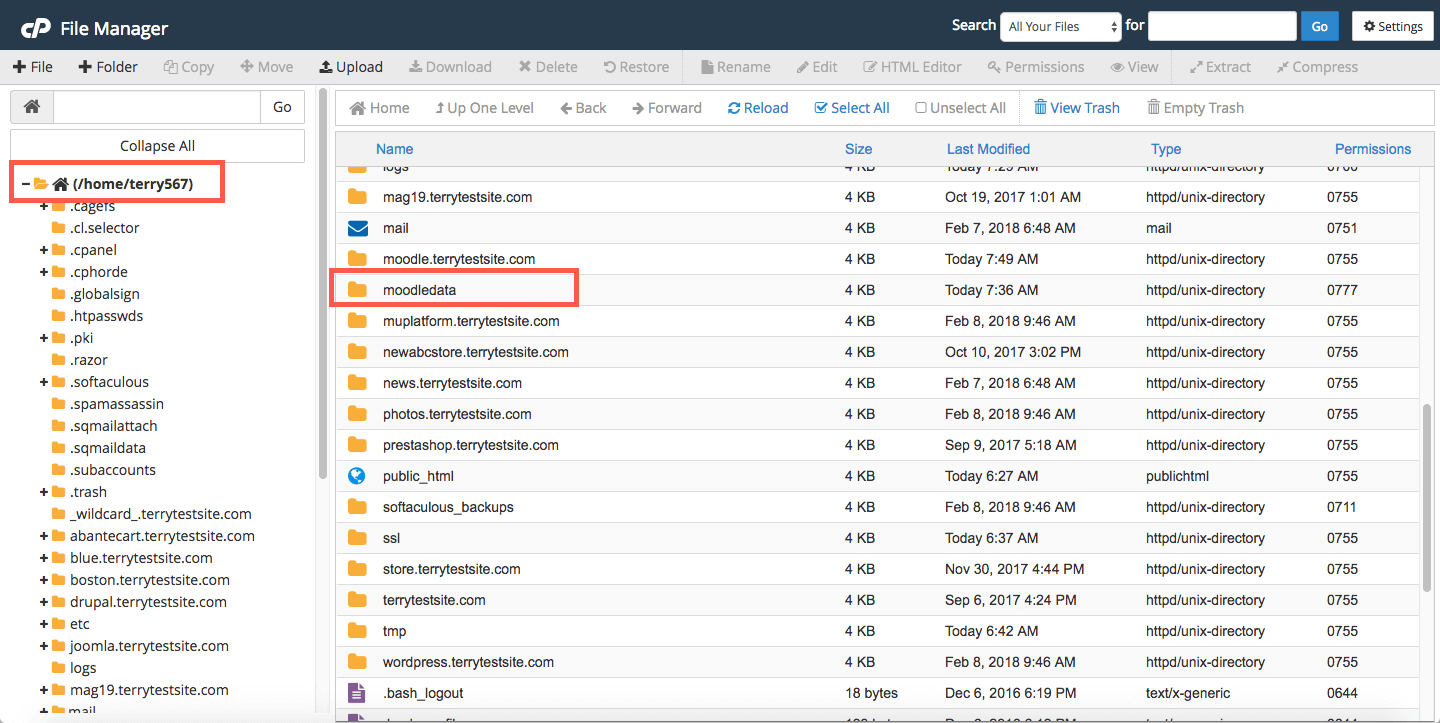
Create a data directory
Moodle also requires a secure data directory for storage. This must be placed in a location that is not accessible via the web. Head back to cPanel File Manager (or your FTP client) and create a new folder called moodledata in your home directory (/home/yourusername].
Install Moodle
In your web browser, visit your Moodle URL to begin the installation.
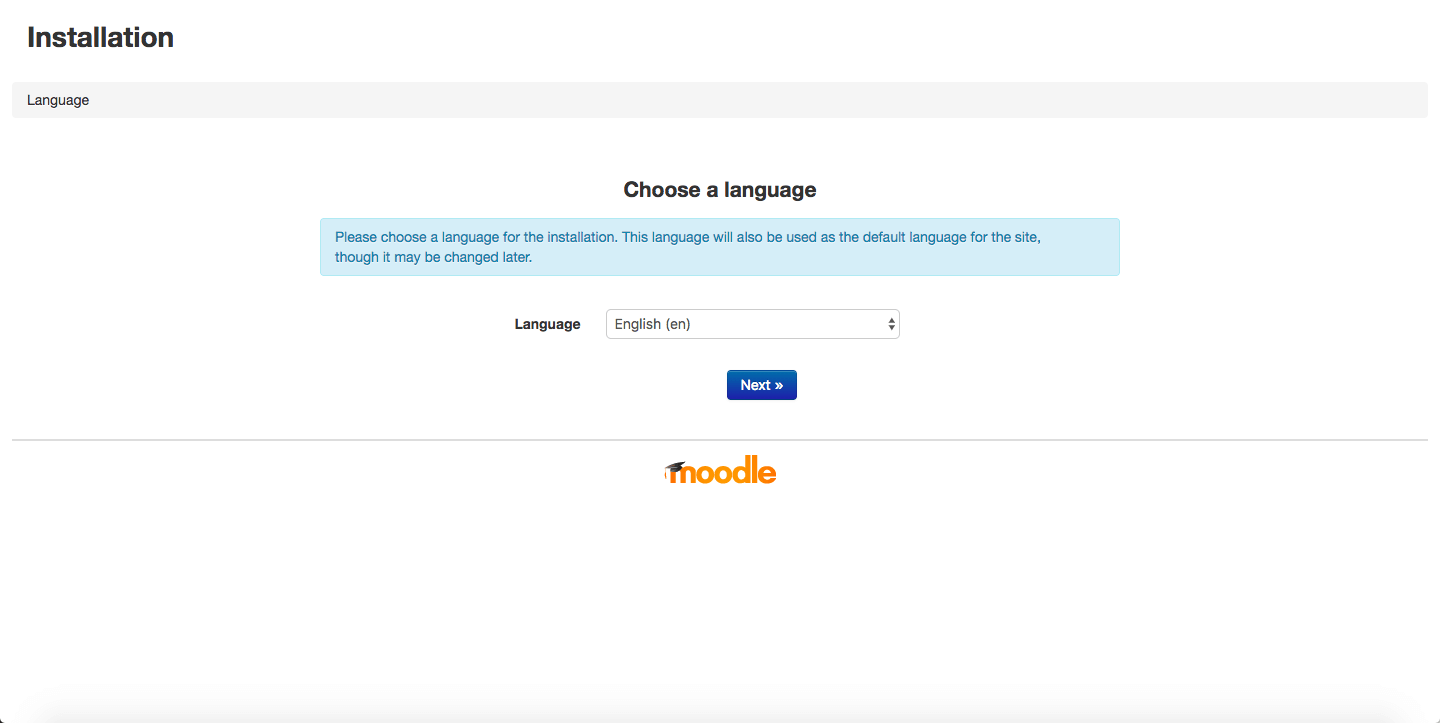
Follow the steps in the installation wizard to confirm the Web address for Moodle directory and data directory.
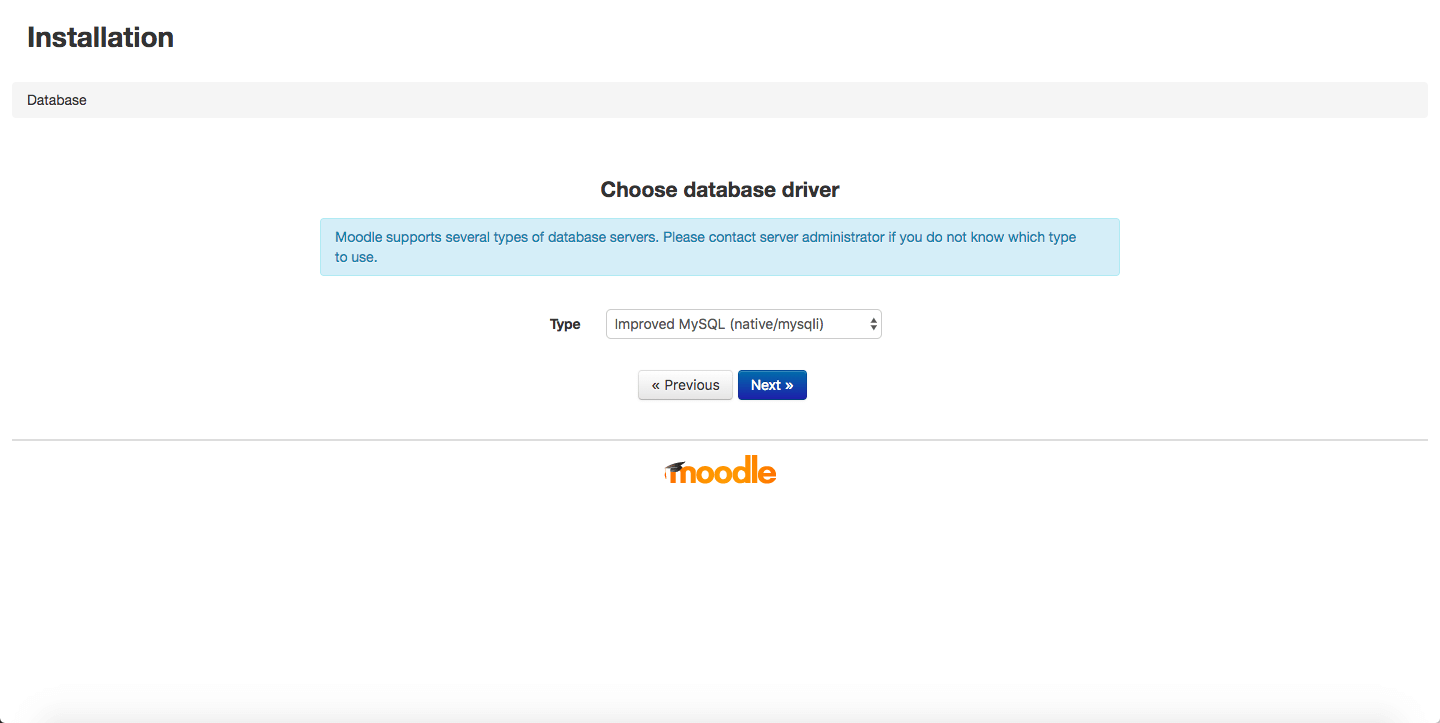
Select Improved MySQL as the database driver, then enter the database user settings you created earlier. Remember that cPanel adds an account name prefix to your database name and user name. So if you enter “moodle” as the database name, it will be saved as “foo123_moodle”. Check Databases > MySQL Databases in cPanel if you experience issues.
The Moodle installer will make a final check of your server configuration before completing the installation.
If you need help with your HostPapa account, please open a support ticket from your dashboard.
