WordPress offers an easy and quick way to set up and manage your website. But no matter the size and speed of your site, you should optimize it to run as efficiently as possible.
WP Super Cache stores dynamically-generated WordPress posts and pages as static files. These static files are then served to users, significantly reducing the processing load on the server and accelerating page speeds.
Follow these steps to install and set up WP Super Cache and enhance the speed of your WordPress website.
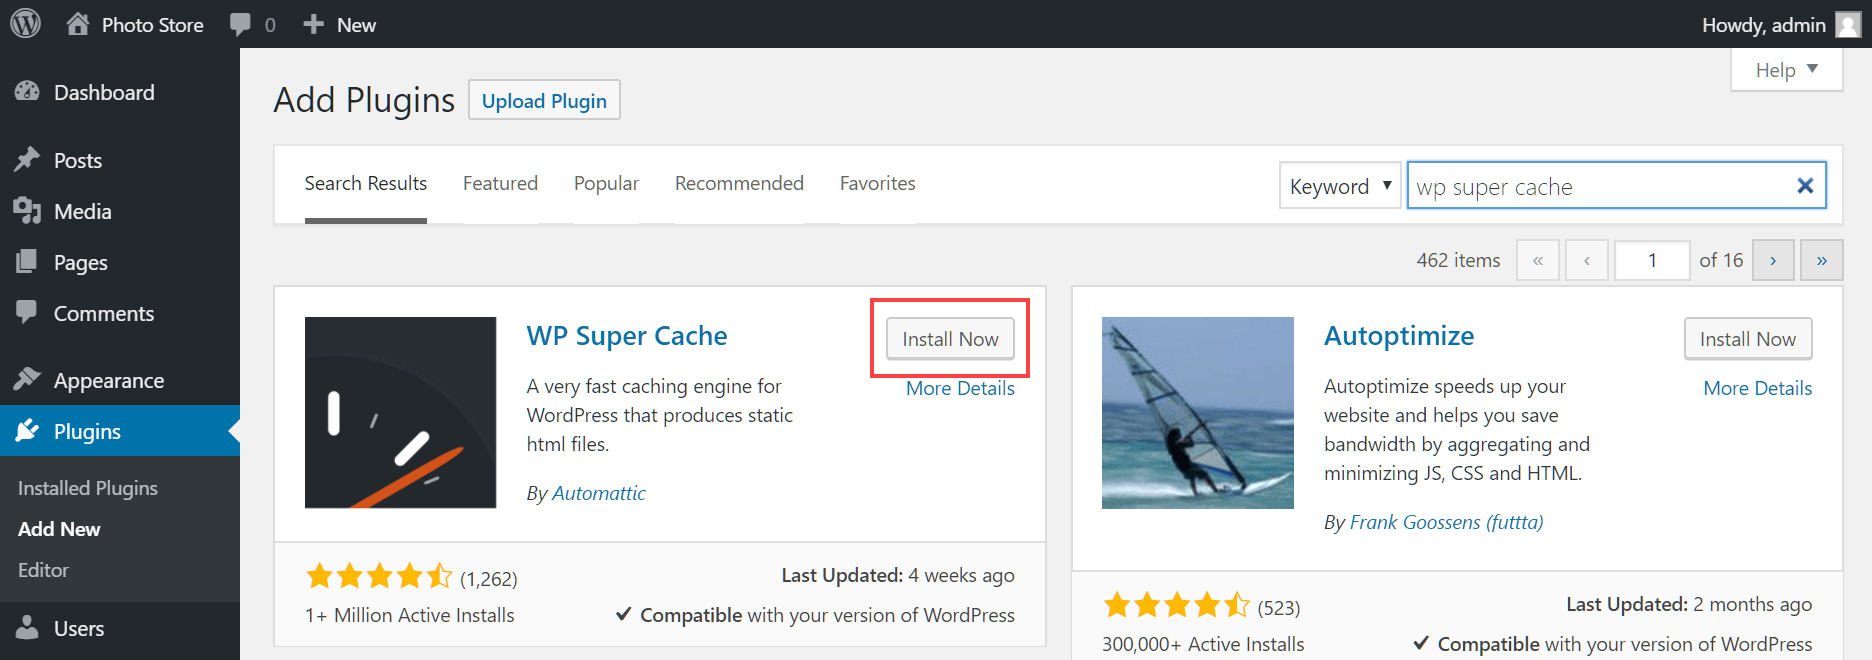
Sign into your WordPress administration menu and, from the sidebar, select Plugins > Add New. Search for WP Super Cache and install it, then activate the plugin. To learn more about installing WordPress plugins, read this HostPapa knowledge base article: How to install plugins in WordPress
Once activated, you’ll be notified that WP Super Cache is disabled. Use the link in the notification to visit the WP Super Cache Settings page, where you can enable caching.

You’ll notice a new WP Super Cache entry in your sidebar’s Settings menu. This also takes you to the WP Super Cache Settings page.
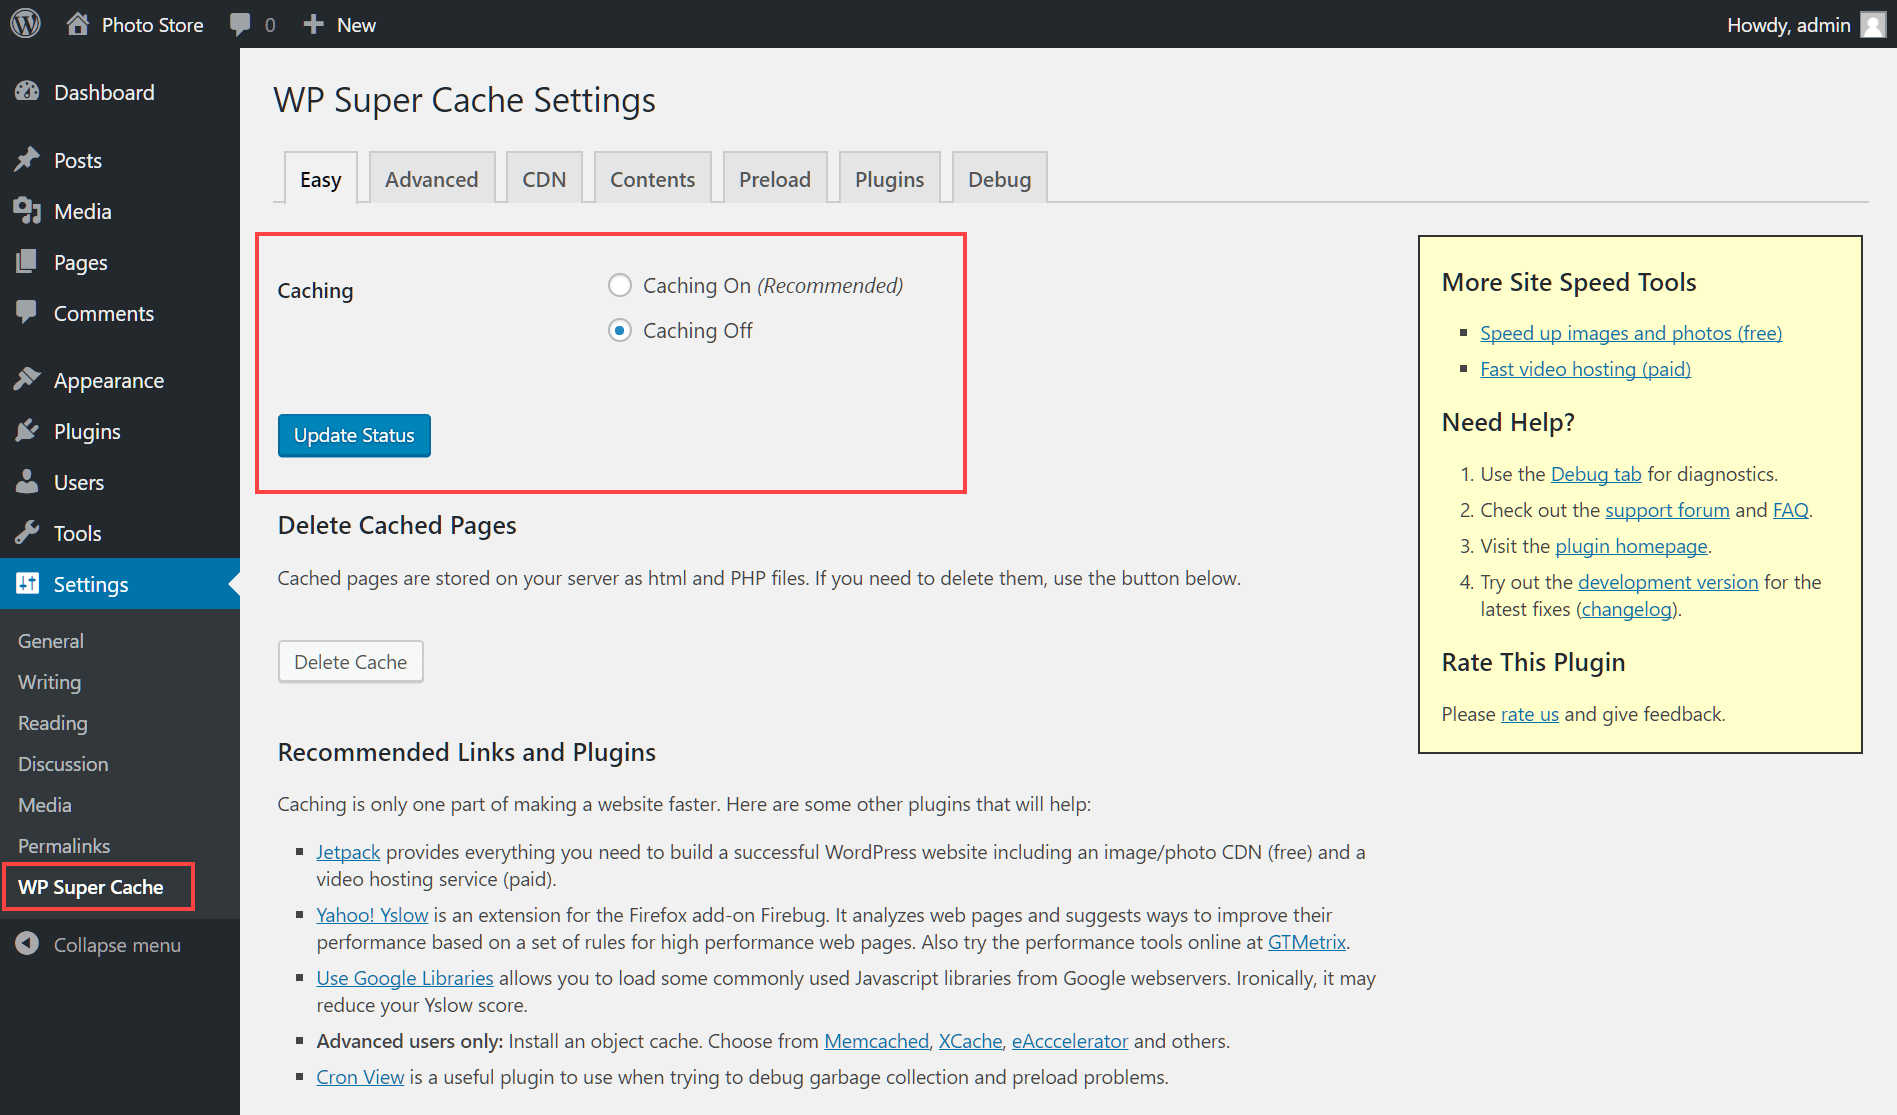
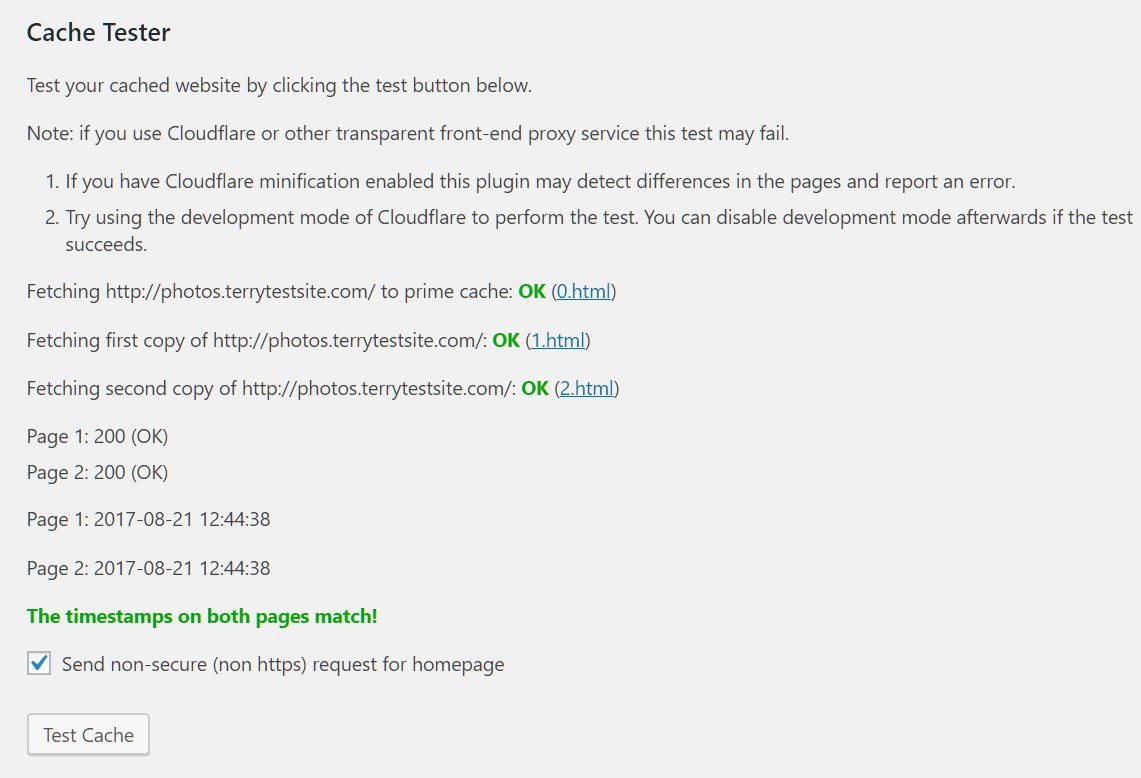
The first step is to enable caching. Click the Caching On radio button, then select Update Status. To check your caching status, use the Test Cache button below. This will fetch multiple copies of your home page and compare timestamps. If your caching plugin is working correctly, these timestamps should match.
Static files generated by WP Super Cache are stored as HTML or PHP files on your server. Should you need to refresh the cached pages following an update, use the Delete Cache button. Your pages will be recached automatically.
The Settings page is segmented into multiple tabs – Easy, Advanced, CDN, Contents, Preload, Plugins and Debug. When enabling WP Super Cache via the Easy tab should serve most users well, you may further optimize site performance by tweaking advanced settings.
Advanced settings
The Advanced Settings tab includes options to change your Cache Delivery Method, Miscellaneous and Advanced settings. Site performance can vary greatly when you modify these settings, depending on the theme and plugins you are using – to the point where your site may not load correctly in some cases. Feel free to experiment with advanced settings, but make sure you back up your site first and check your site’s front-end with each change you make.
The following settings are suggestions for optimizing your site. Test each setting carefully to ensure it is suitable for your site.
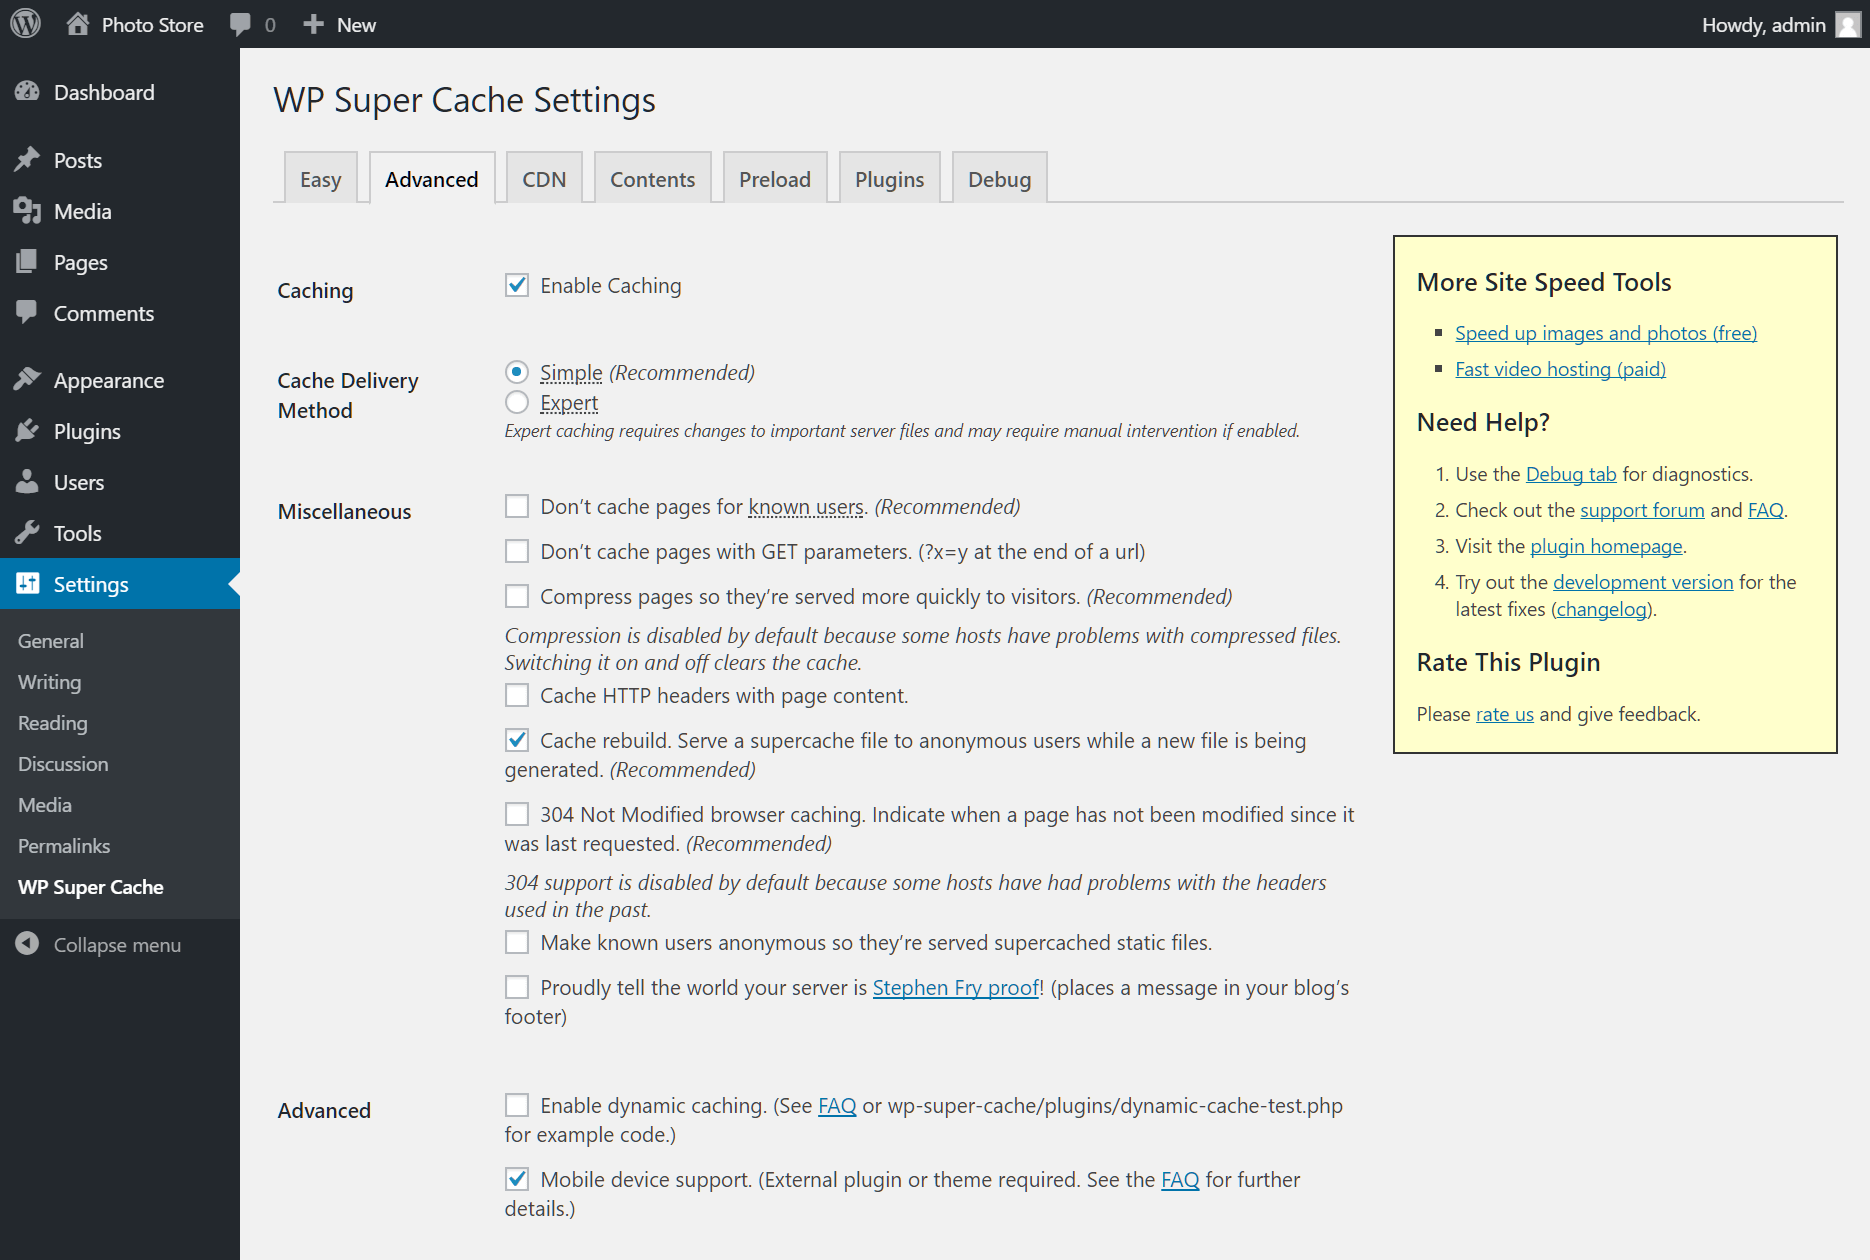
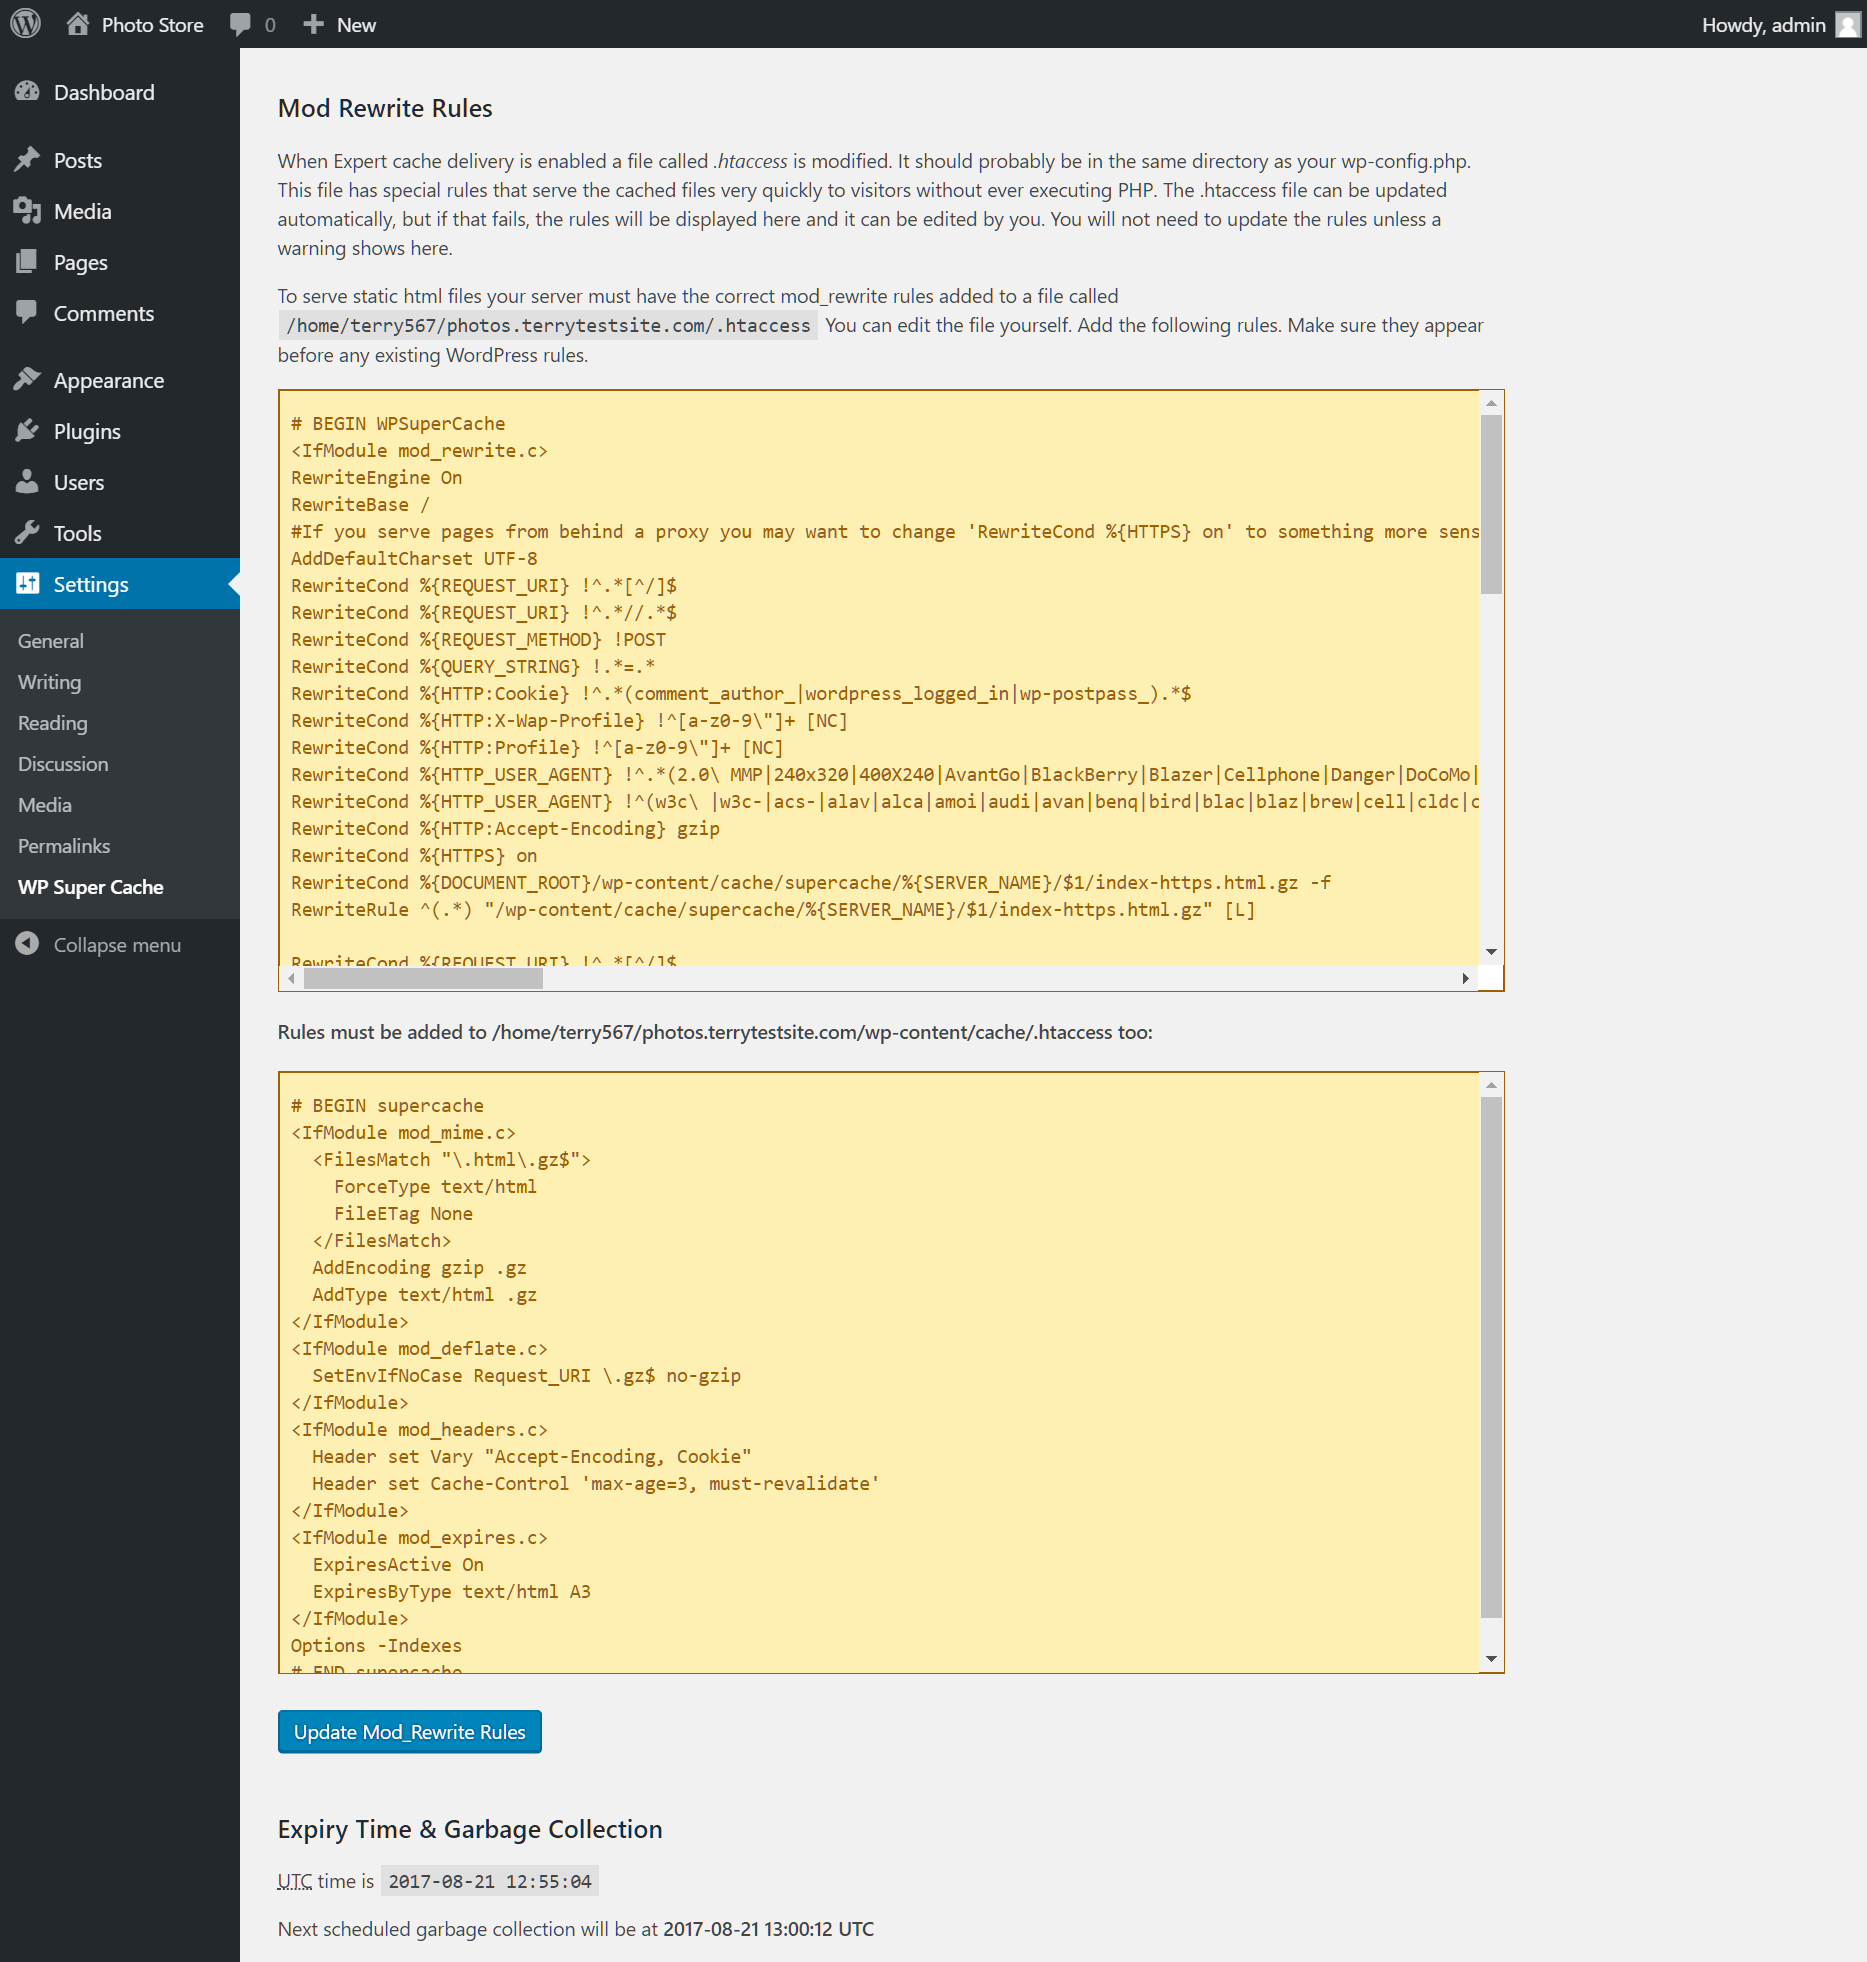
Switching from Simple to Expert settings requires changes to your .htaccess file. These changes can be automatically implemented from within the plugin, so there’s no need to manually edit the file (unless a problem occurs). Use the radio button to enable Expert Settings, then click Update Status. Scroll down the page and use the Update Mod_Rewrite Rules to enable the .htaccess changes.
Use the Don’t cache pages for known users option to ensure that logged in users (such as administrators) don’t view cached files on the site. This ensures you always see the latest, dynamically generated version of your posts and pages.
Enable Compress pages so they’re served more quickly to visitors. By default, this option is disabled. Also enable 304 not modified browser caching. This is a small header that indicates if a page has not been modified since last request.
Enable Don’t cache with GET parameters and Cache rebuild options, which can be useful for sites with logged in users that do not edit a lot of content on the site.
Further down the page, enable the Only refresh current page when comments made option. This refreshes a post in the cache when a comment is made, ensuring your readers see the latest content.
Each time you make a change, click Update Status. Scroll down the page and use the Update Mod_Rewrite Rules to enable the associated .htaccess rules.
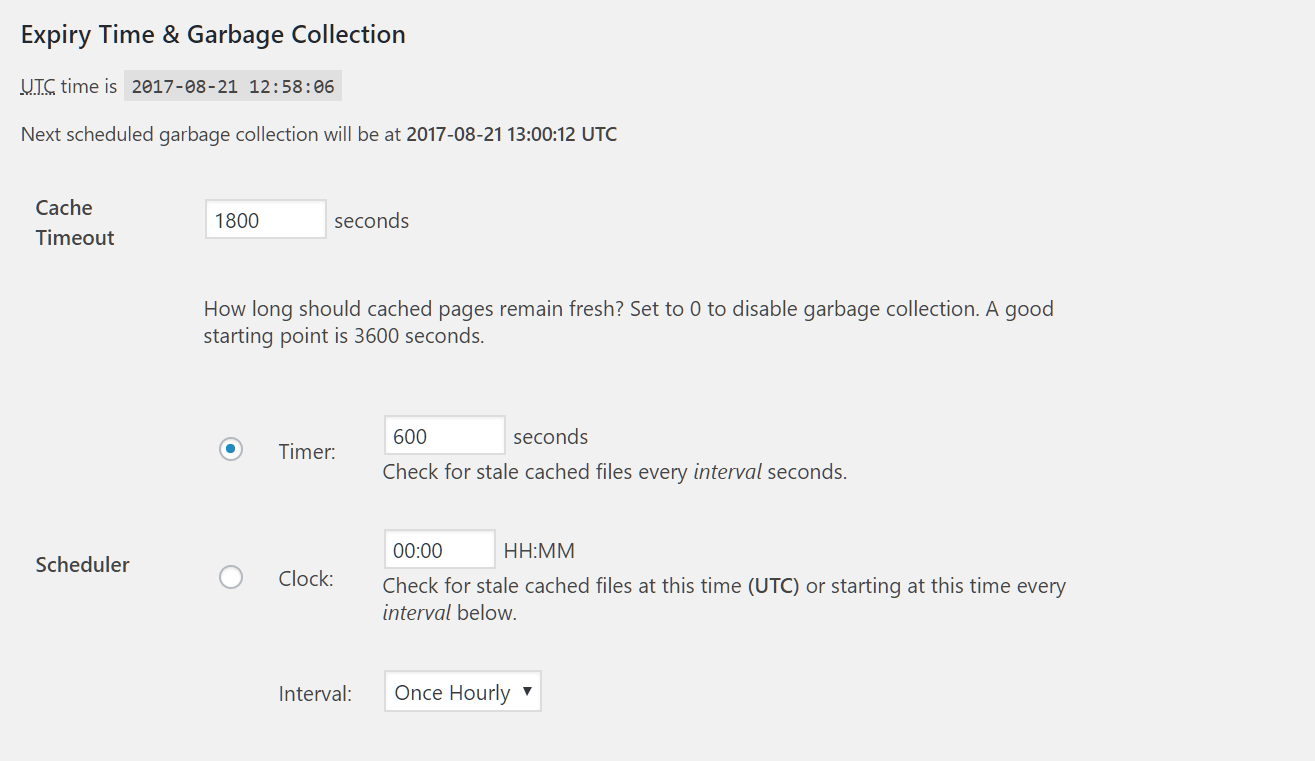
Towards the bottom of the page, you’ll see an Expiry Time & Garbage Collection section which determines how long cached pages remain fresh. The default 3600 seconds should work well for most sites, but if you have many posts and pages, you could experiment with a shorter duration.
CDN
The CDN tab is used to configure the cache to work with a Content Delivery Network. The priority of a CDN is to reduce latency, in other words, to reduce the amount of time it takes to load a website. Typically, latency is caused by two factors: routers and distance. A CDN helps with physical distance latency by creating a distributed network that is set up across many data centers around the world.
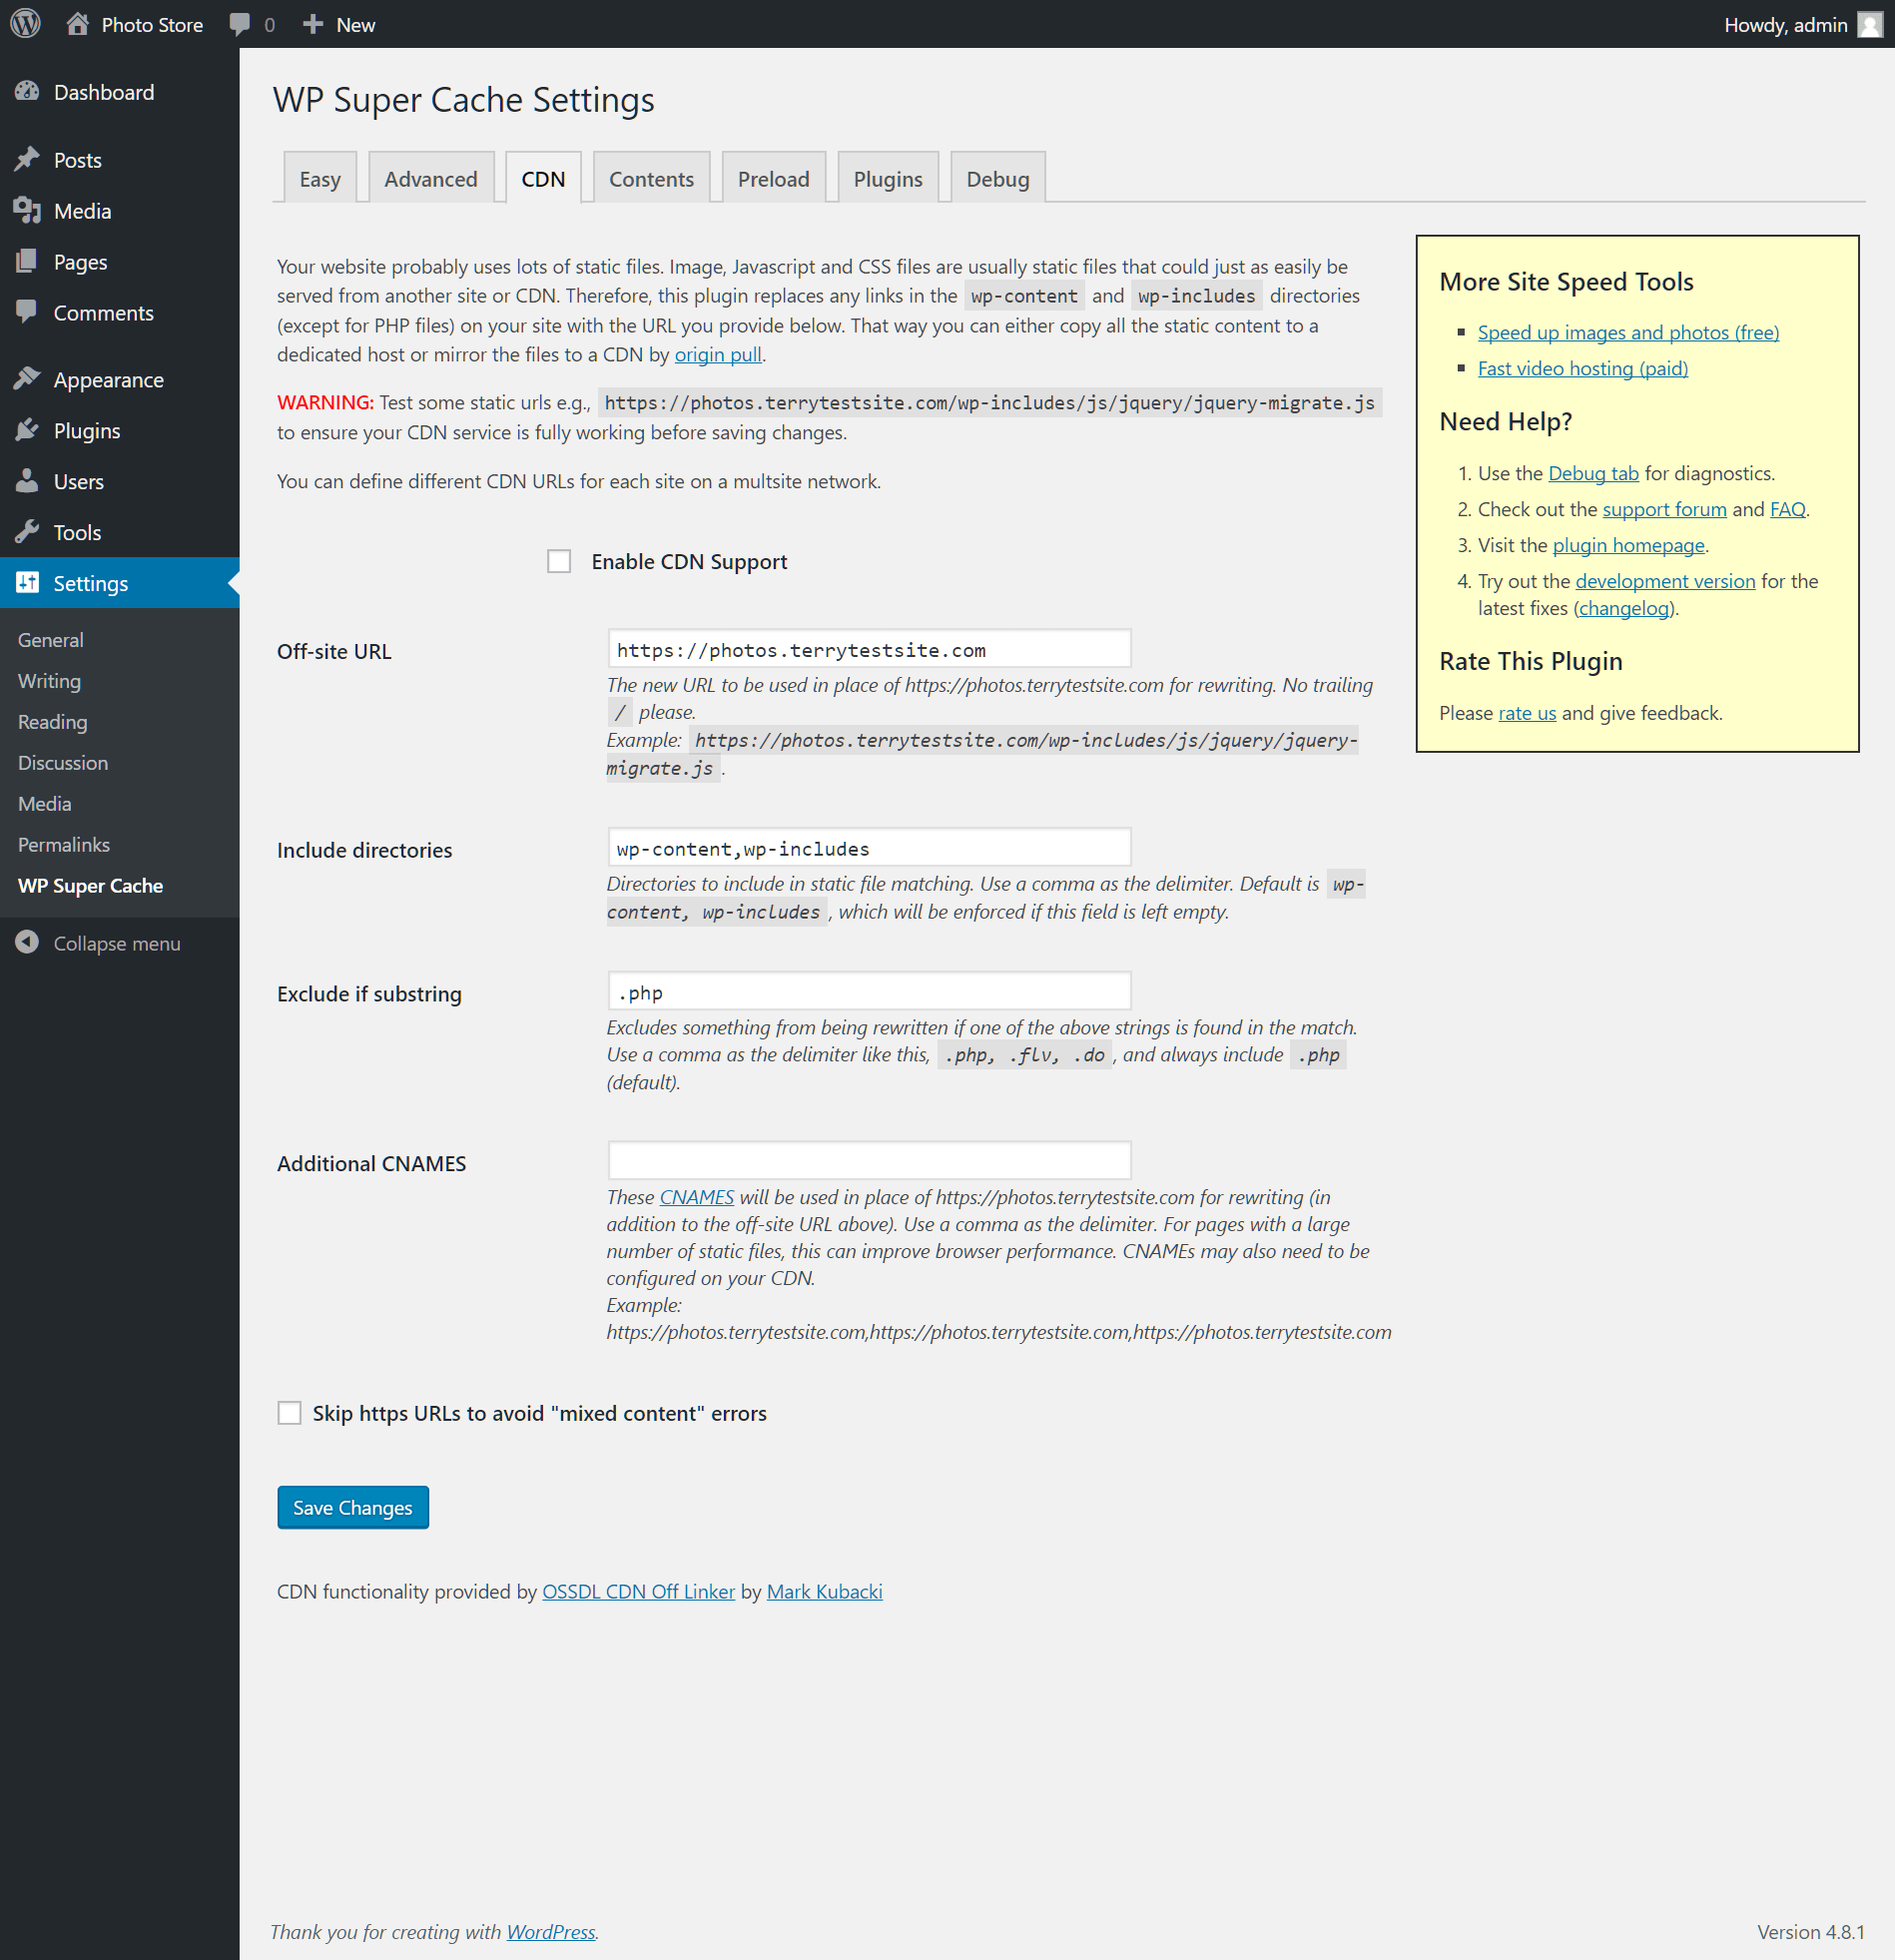
Learn more about CDNs in this HostPapa knowledge base document: What is a Content Delivery Network (CDN)?
Other settings tabs
The remaining Settings tabs provide reporting features and other configuration options. Contents provides a report about your cache size and allows you to view a list of cached files. Preload supports the caching of every post and page on your site. This create a lot of static files so you should be careful with this setting if you have a large amount of posts.
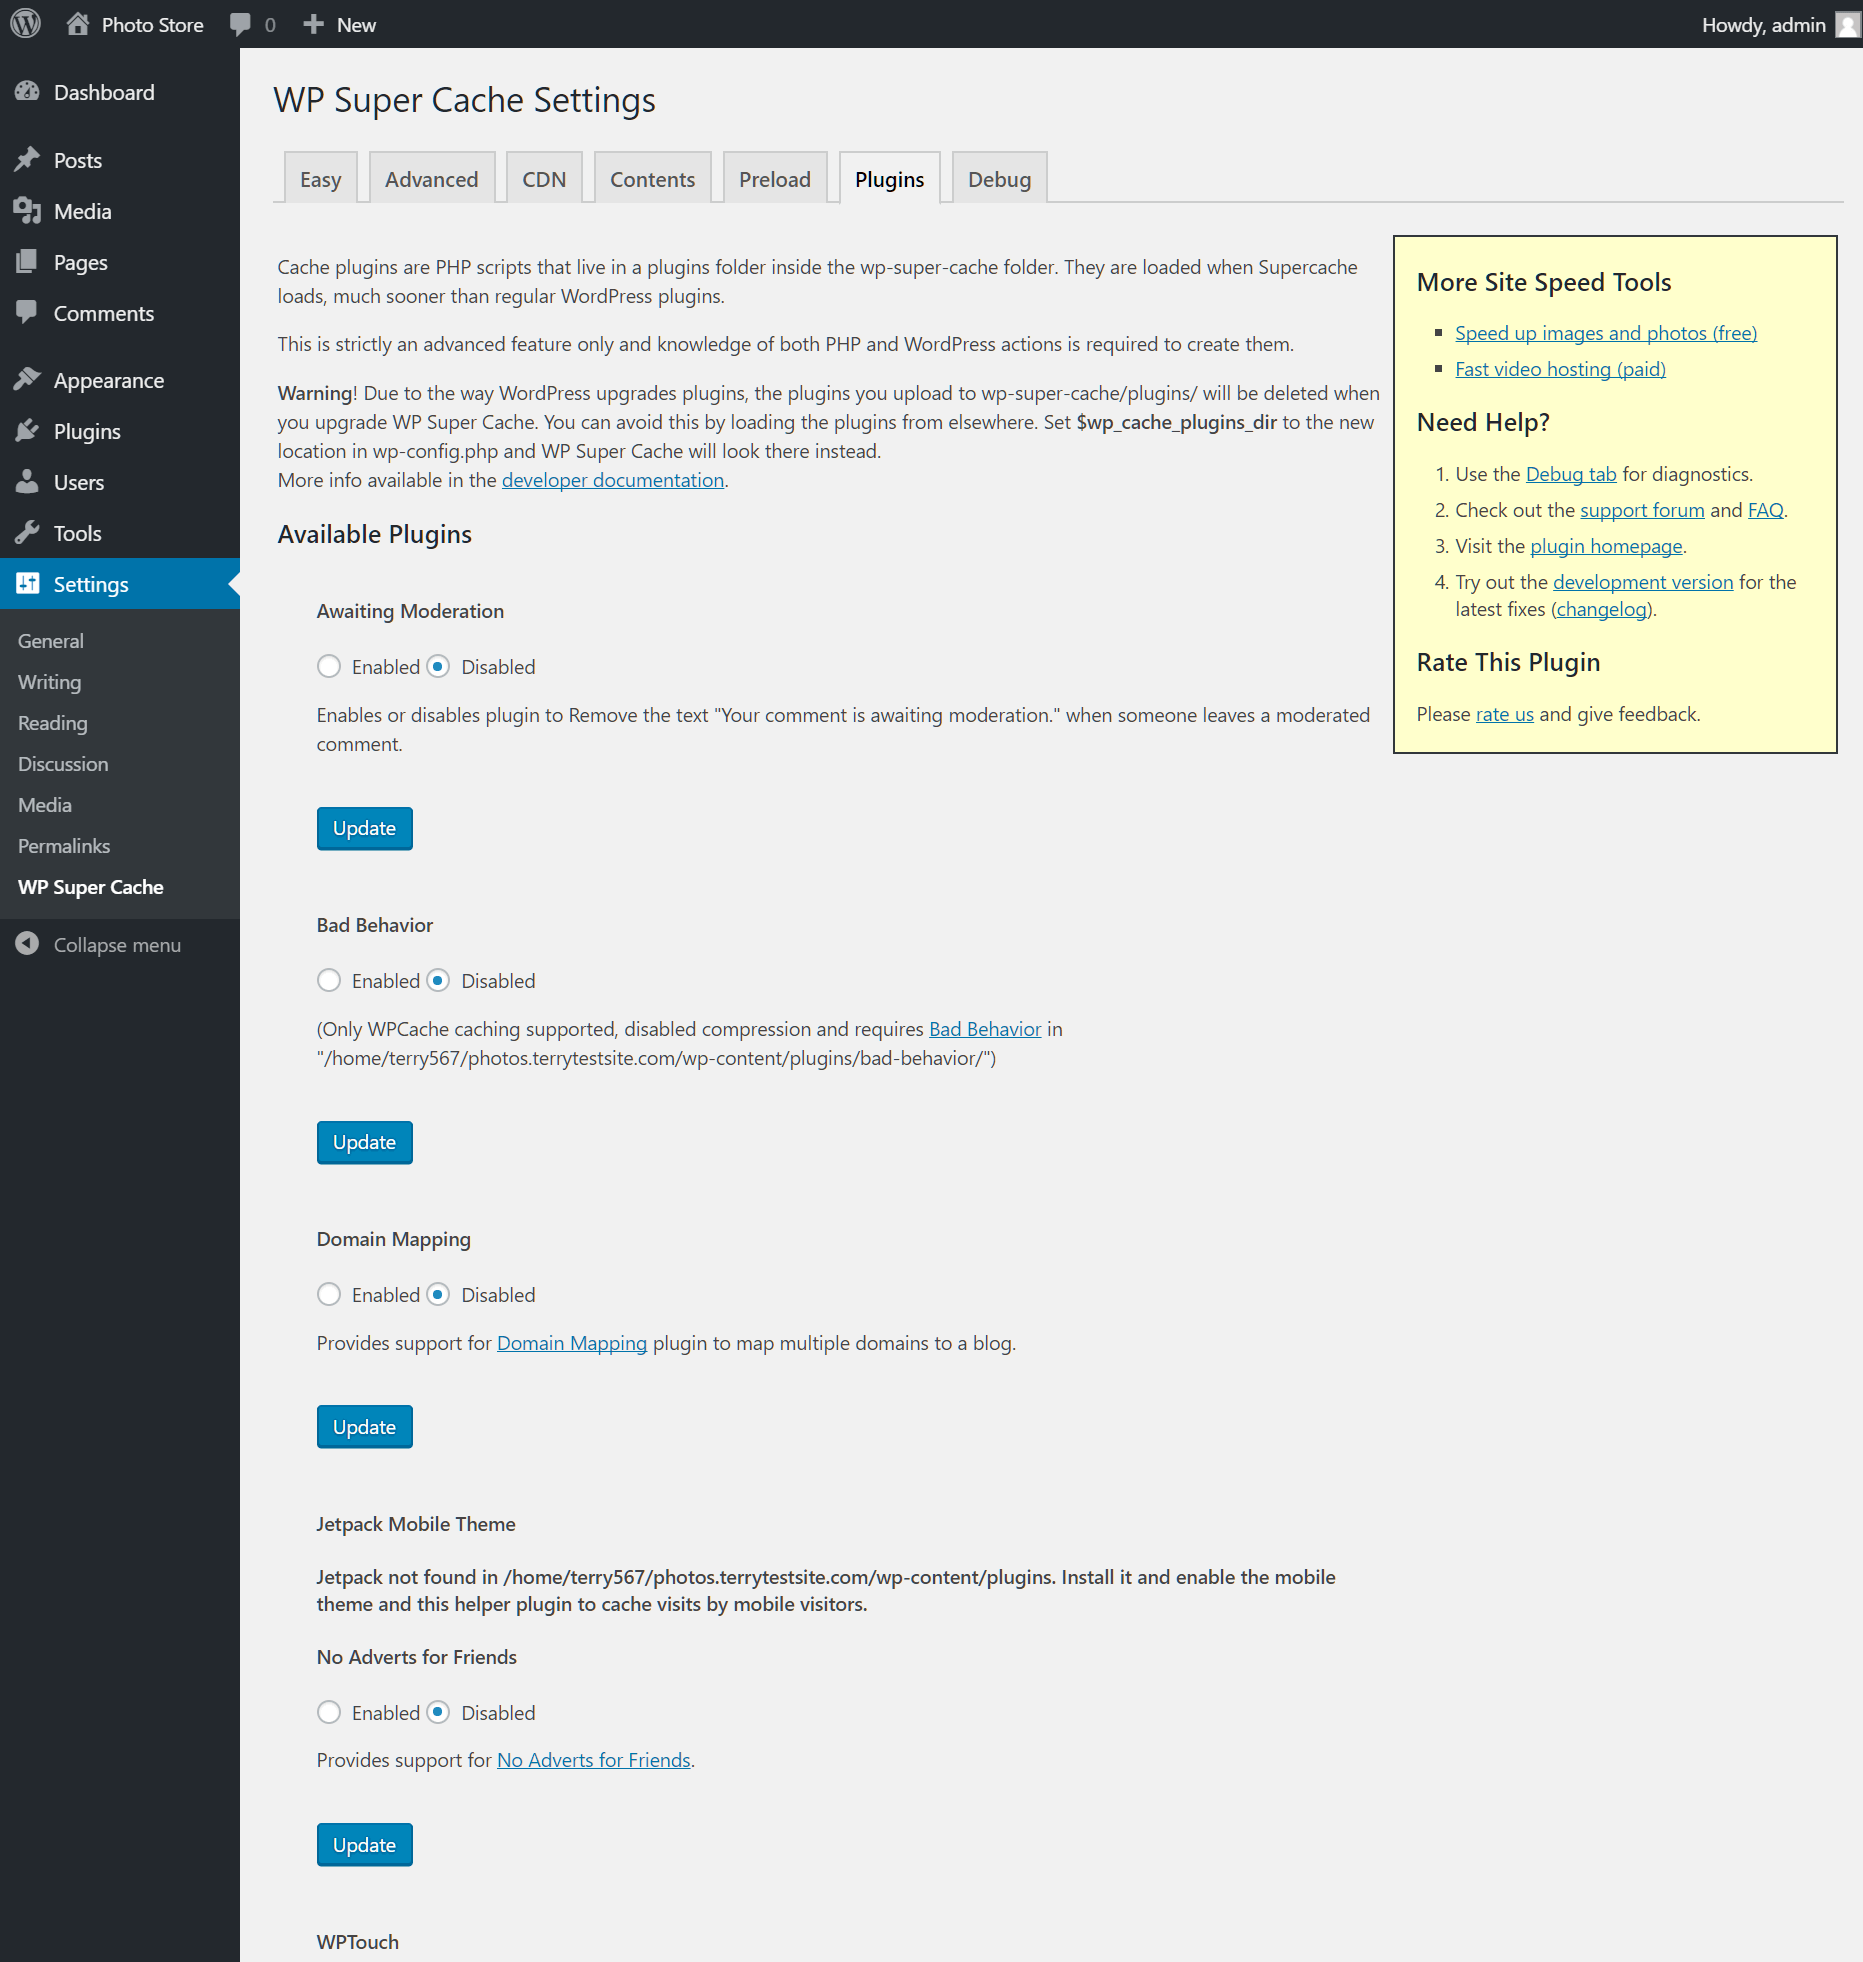
The Plugins menu allows you to extend the WP Super Cache feature set with additional features and Debug provides logging information for developers.
For further questions, or if you need help, please open a support ticket from your HostPapa Dashboard. Follow this link to learn how.
