Submenus, also called parent-child or hierarchical menus, are useful for organizing website navigation links. Joomla! submenus can be displayed as a single menu with multiple levels or as separate menu modules.
In this article, we’re describing how to create one menu with two levels of menu items. Specifically, we’re creating a menu called Recipes, which will include two parent level menu items: Main Courses and Desserts. Main Courses will have two submenu items: Spaghetti and Risotto. Desserts will also have two submenu items: Cannoli and Tiramisu.
Before you begin
Before you begin creating submenus, make sure that the articles the submenu items will link to have been created. In our example, we’ve created four articles: Spaghetti, Risotto, Cannoli, and Tiramisu. For more information about Joomla! articles, see What are Joomla! articles?
Creating submenus also requires a menu, menu module, and menu items. We’ll briefly cover how to create these items in this article, but for more detailed information, please see these articles from the HostPapa knowledge base:
Create the menu
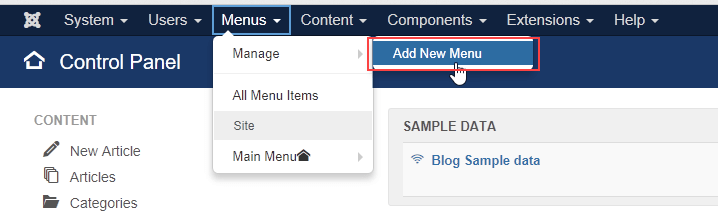
Log in to your Joomla! administrator back-end and go to Menus > Manage > Add New Menu.
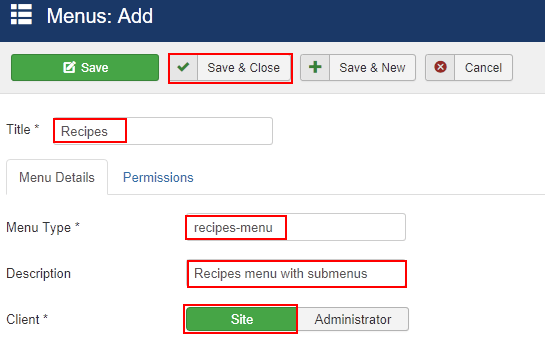
Add a menu called Recipes and enter a unique Menu Type and Description. Click Save & Close.
Add the parent level menu items
In this example, we’re creating two parent level menu items: Main Courses and Desserts. The steps for creating each top-level menu item is the same, with the only difference being the Menu Title.
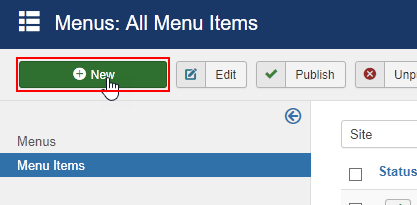
Go to Menu Items and click +New.
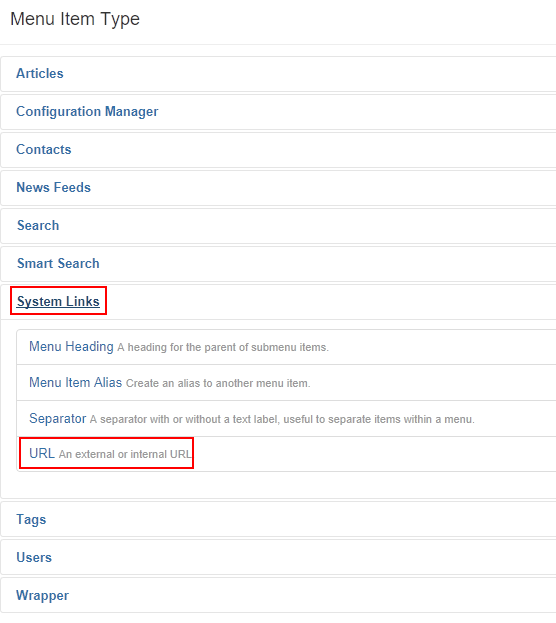
In Menu Item Type, select System Links > URL.
Enter the following details:
- Menu Title – Type the name of the parent level menu item. For example, Main Courses.
- Link – Type a hashtag (#).
- Menu – Select Recipes.
- Parent Item – Select Menu Item Root
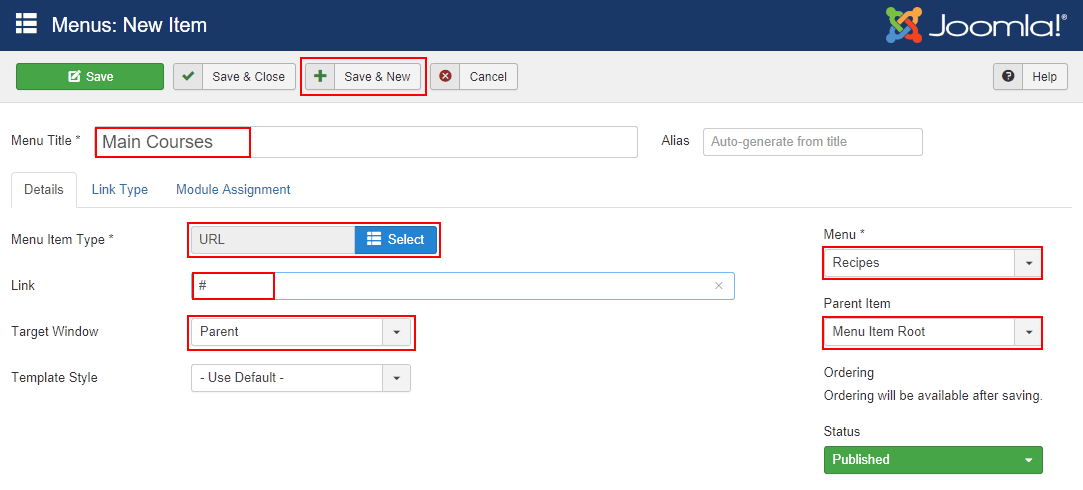
Click Save & New to save this menu item and begin adding the Desserts menu item. Use the same settings (except Menu Title, which should be Desserts) and click Save & Close when you’re finished.
Add the submenu items
Now we’ll add the four submenu items; Spaghetti, Risotto, Cannoli, and Tiramisu. The steps for creating each submenu item is the same, with the only difference being the Menu Title.
Go to Menu Items and click +New.
In Menu Item Type, select Articles > Single Article.

Enter the following details:
- Menu Title – Type the name of the submenu item. For example, Spaghetti.
- Select Article – Click Select and click the article the menu item will link to.
- Menu – Select Recipes.
- Parent Item – Select the appropriate parent level menu item. For example, Main Courses.
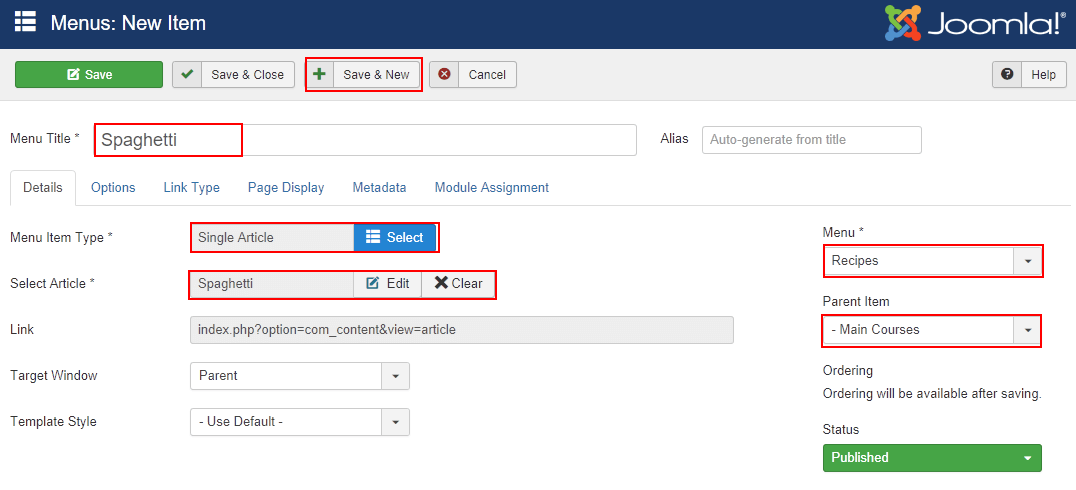
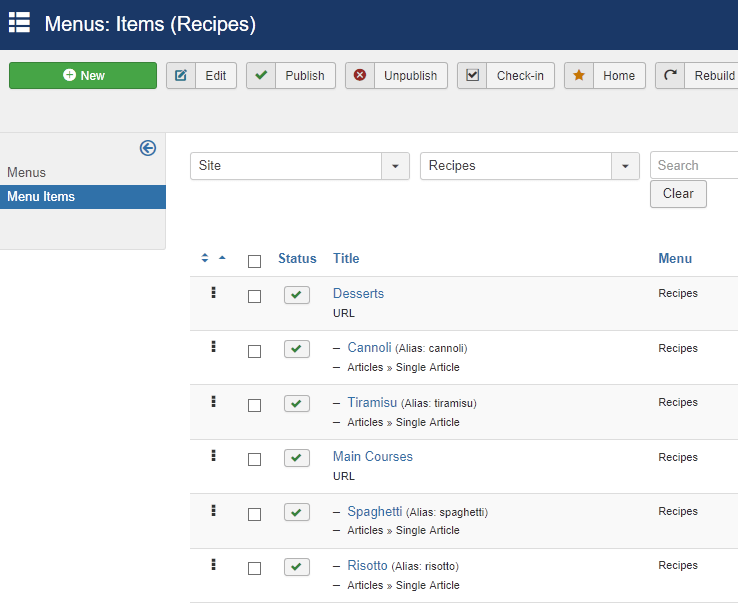
Click Save & New to save this menu item and begin adding the remaining submenu items. Click Save & Close after you’ve added the last submenu item. When you’re finished, the Menu Item Manager should look similar to this:
Update the menu module
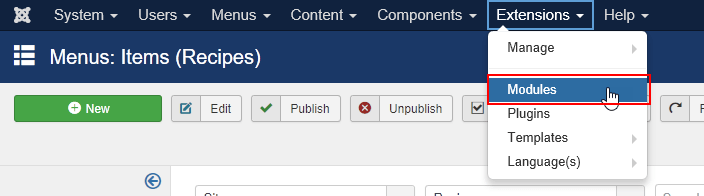
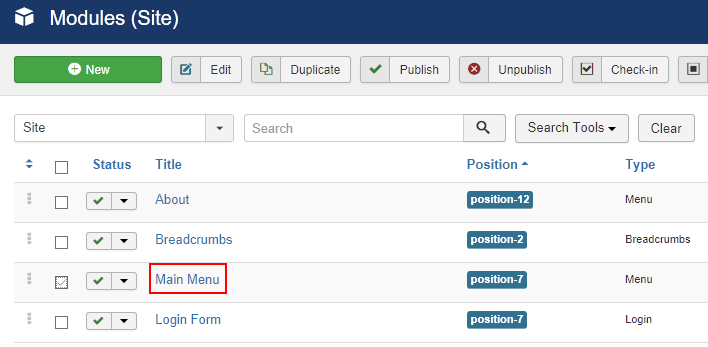
The last step is to update the menu module, which is required to display the menu and menu items on your site. Go to Extensions > Modules.
Click the menu module associated with your menu. In our example, it’s Main Menu.
Enter the following details:
- Select Menu – Select the menu that you created. In this example, the menu is Recipes.
- Start Level – Select 1.
- End Level – Select All.
- Show Sub-menu Items – Click Yes.
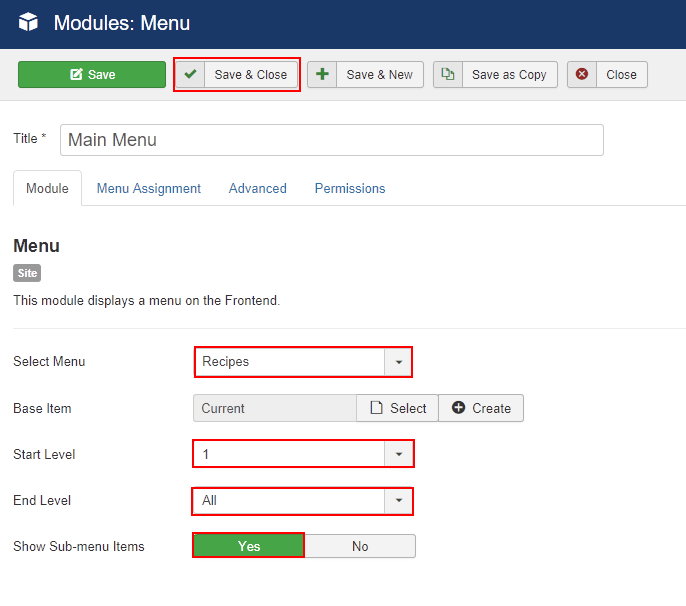
Click Save & Close.
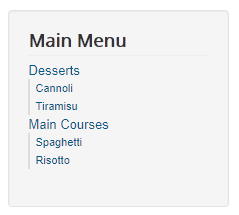
Visit your website in a web browser to view the changes. How the menu and menu items look depend on which template you’re using. In our example, it looks like this:
More information
For more information, see Joomla! in the HostPapa knowledge base.
If you have any questions or need help, you can always contact HostPapa Support by opening a support ticket. Details about how to open a support ticket are here.
