eCommerce features can be supported in WordPress via a plugin called WooCommerce. It offers a comprehensive array of retail features and supports hundreds of third-party addons that enhance its capabilities.
While WooCommerce is reasonably easy to get along with, once installed, you’ll find that there are many settings to work through to optimize your online store. Here are our tips for configuring WooCommerce on your HostPapa server.
How to configure WooCommerce via the Quick Start Wizard
Once WooCommerce is installed and activated, the Quick Start Wizard appears and creates several page templates:
- Shop – to display your products.
- Cart – the shopping cart that bundles purchases and begins checkout.
- Checkout – the payment processing page.
- My account – where registered customers manage their account and view previous orders.
Once the pages are created, you can manage them from the Pages menu. Choose which pages are displayed on your site from the WordPress menu editor – Appearance > Menus.
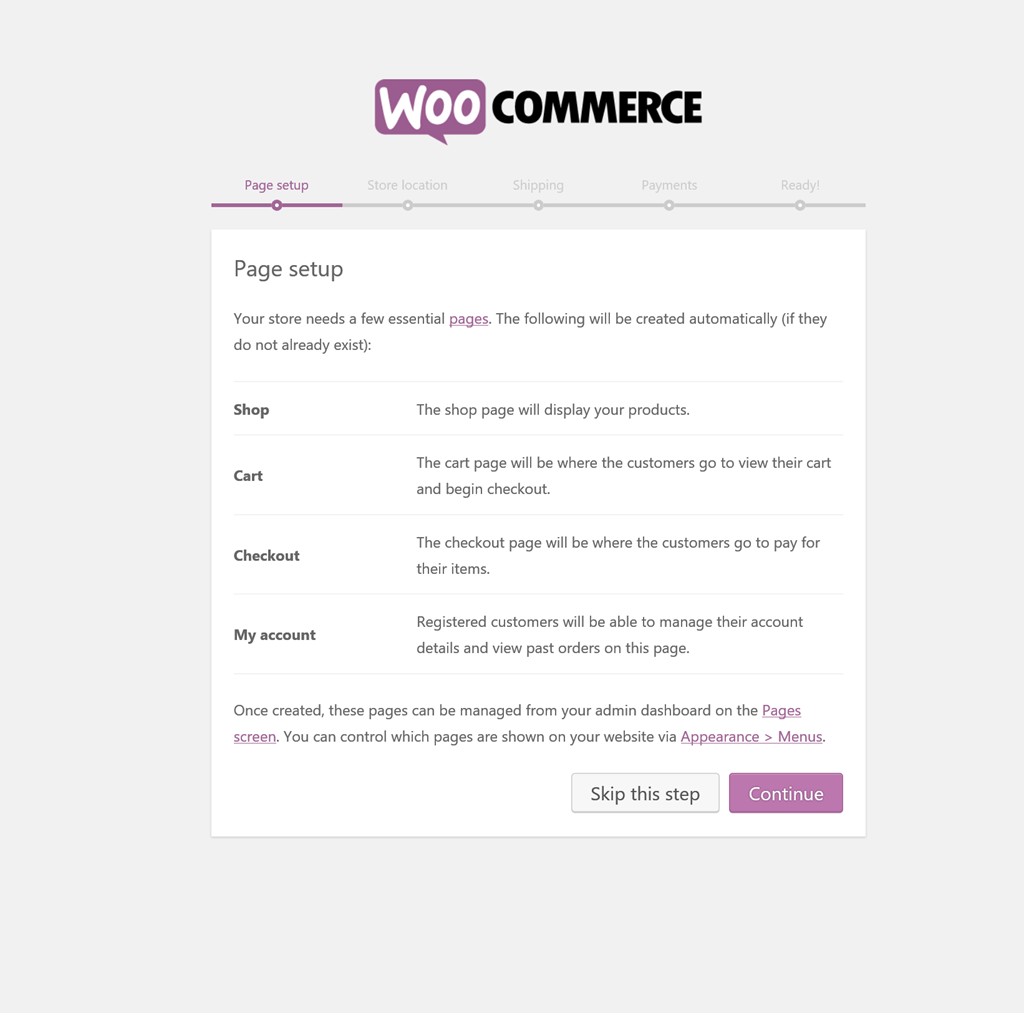
Click the Continue button.
Setting the store location, currency and tax modules
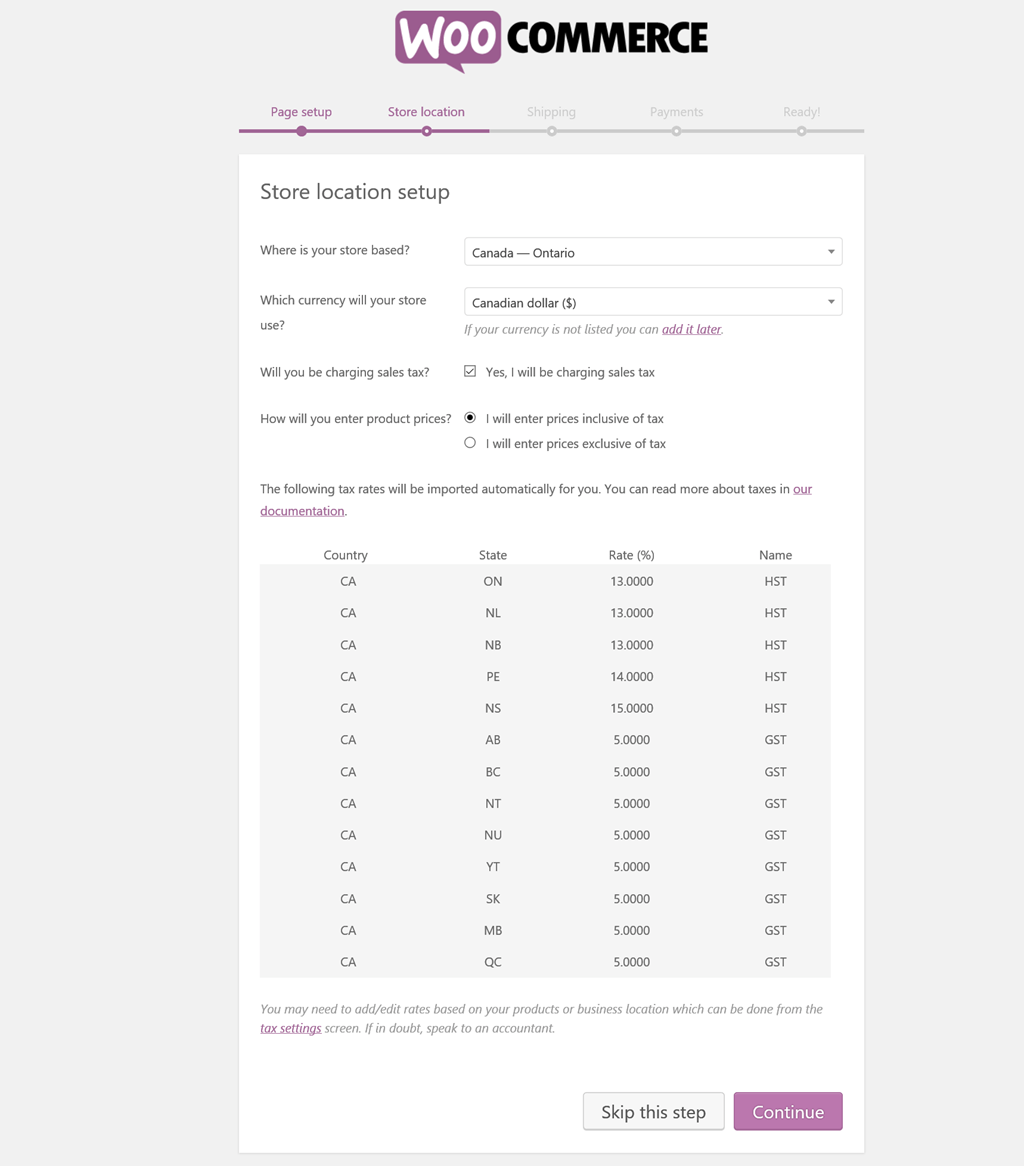
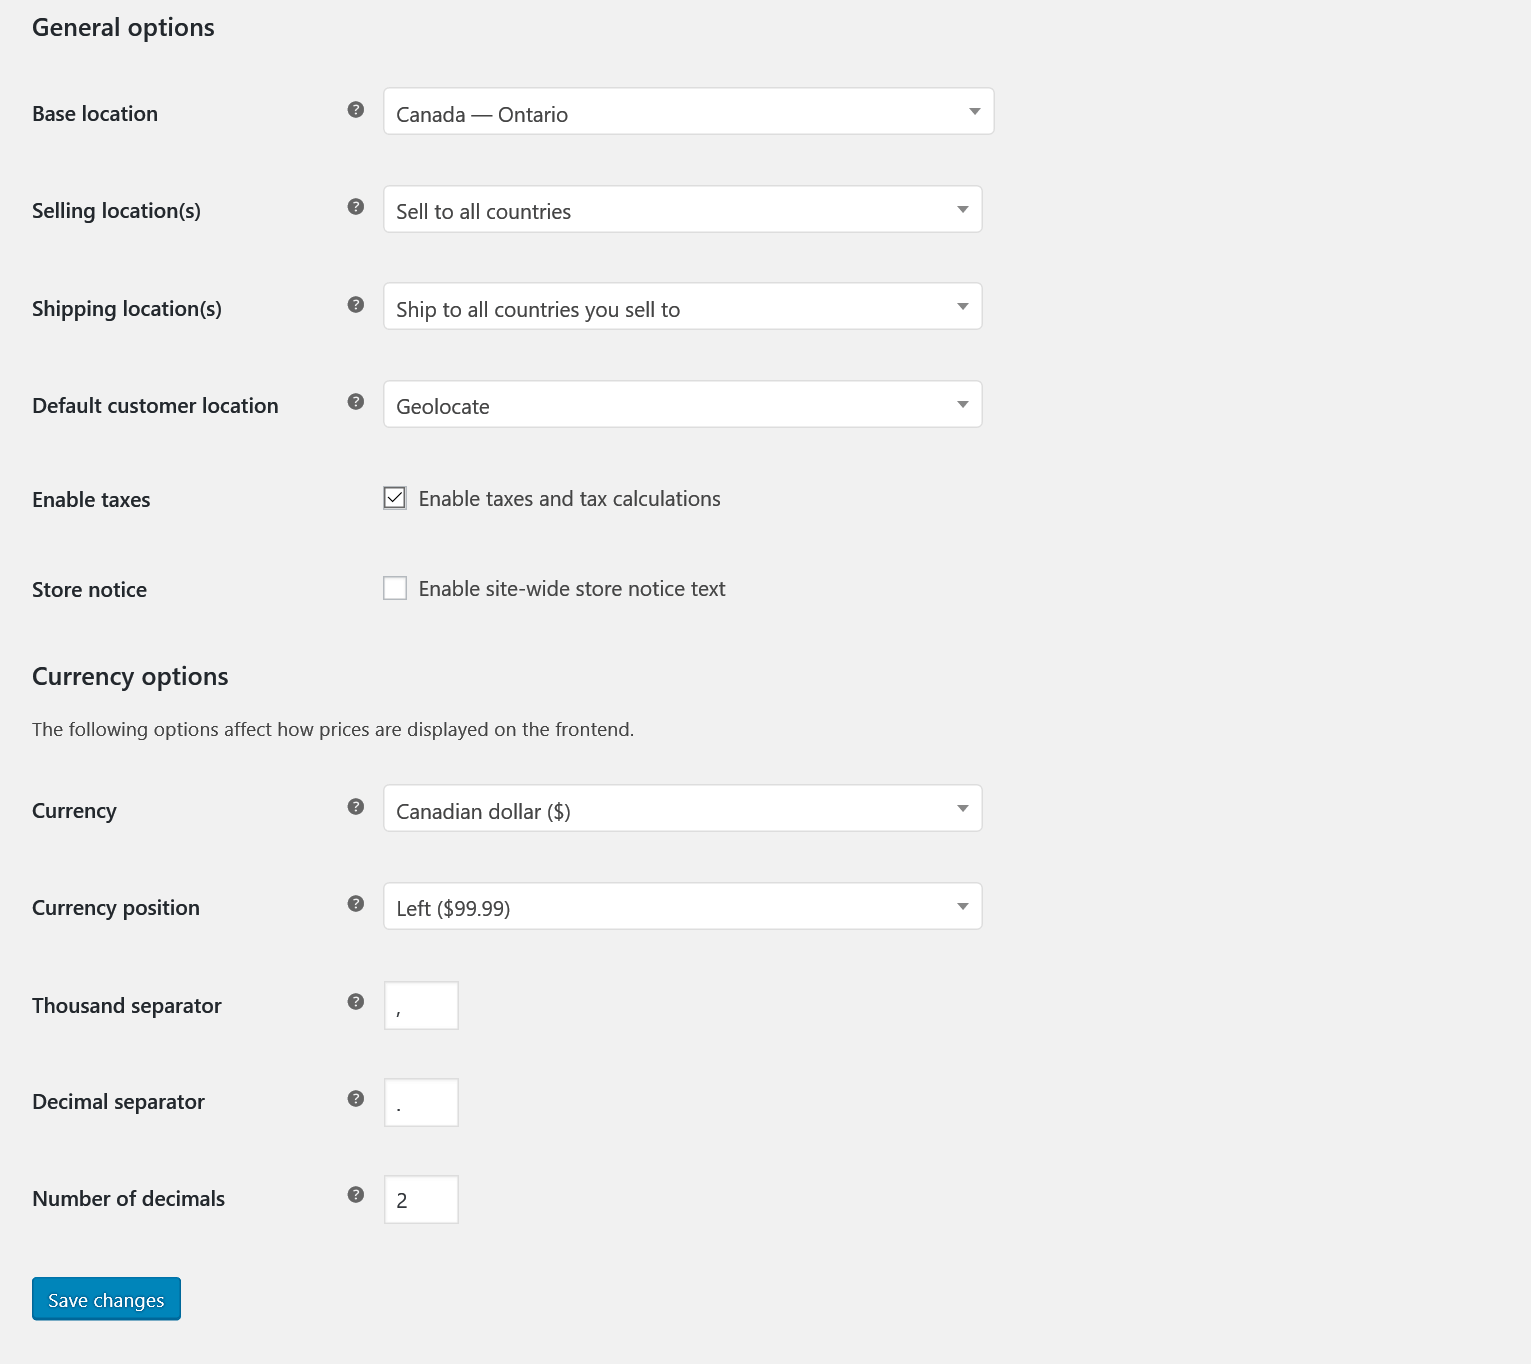
Next, configure your Store Location settings. Select the country and state/province in which your store is located as well as the currency your store will use. If sales tax are involved, select if the prices will include or exclude the sales tax and WooCommerce automatically calculates the taxes depending on your customers’ location.
WooCommerce might automatically import state/provincial for you. If not, you’ll be able to create additional or modified rates in the WooCommerce tax settings screen later.
Click Continue
Setting the store shipping module
Next is your store’s shipping configuration. WooCommerce’s shipping extension can display live shipping rates from many shipping providers. Use the dropdown menus to configure the Weight and Dimension units your store will use to calculate shipping costs.
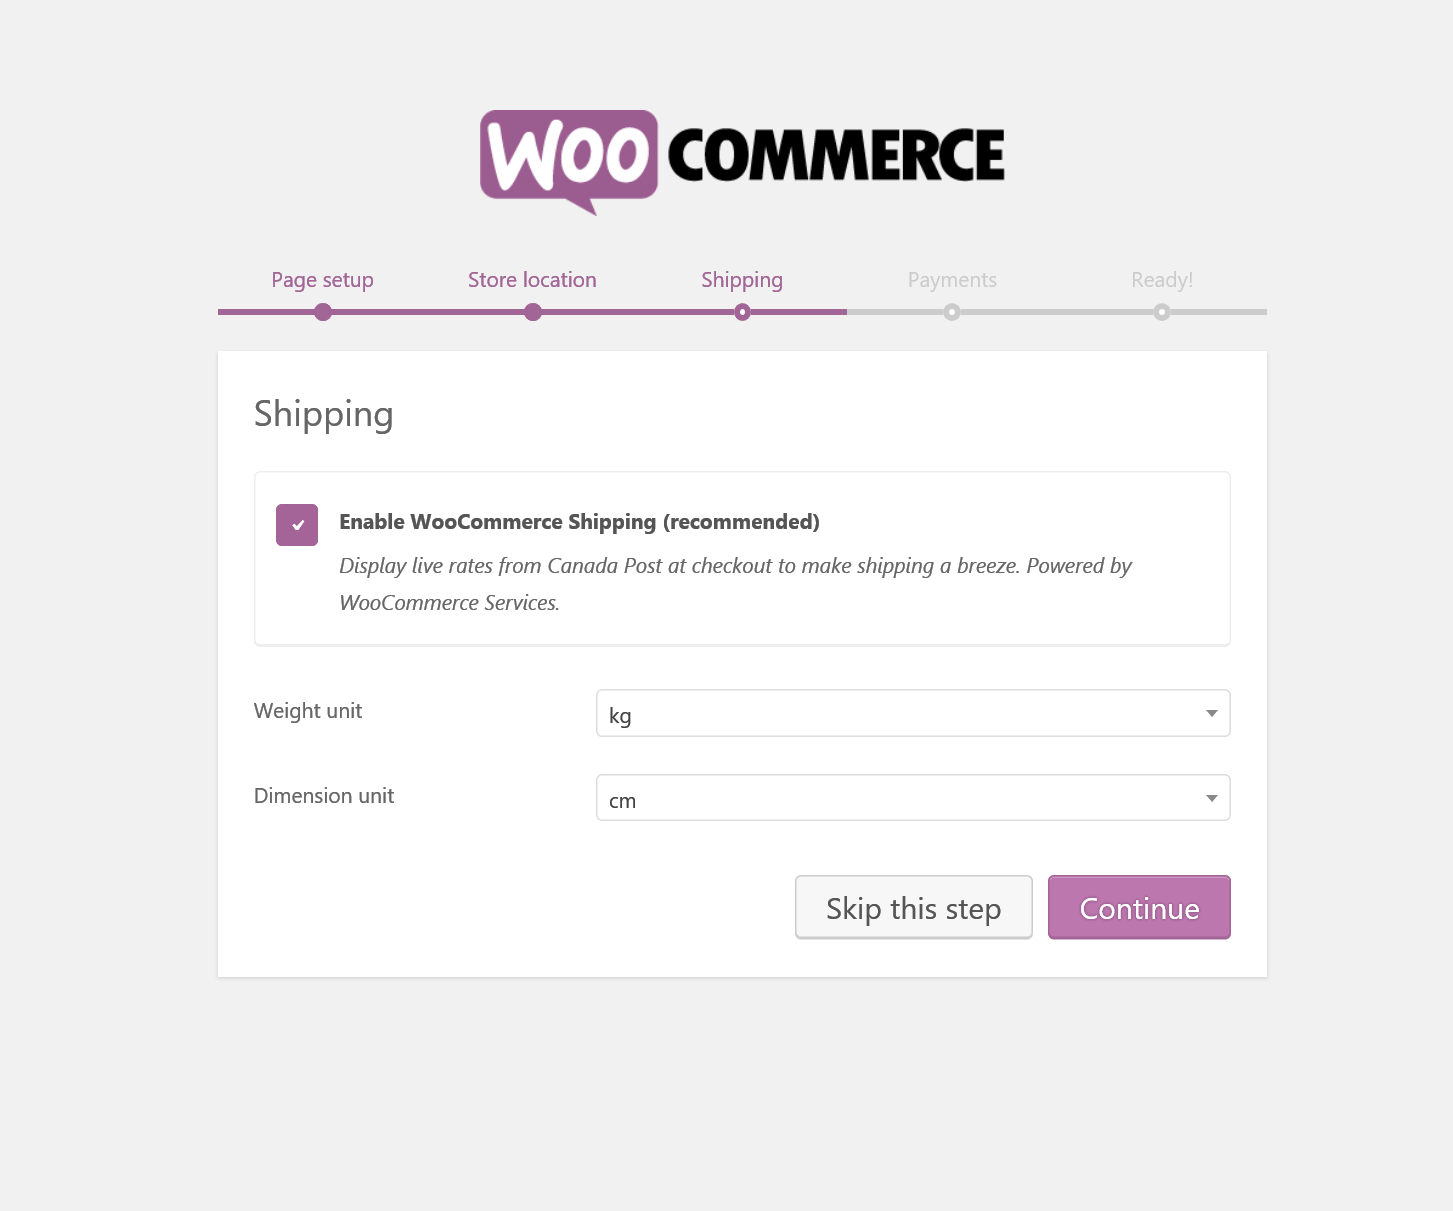
Click the Continue button.
Setting the store payment module
WooCommerce supports a number of payment gateways (many through third-party extensions), but the popular PayPal and/or Stripe, among others, can get you up and running quickly.
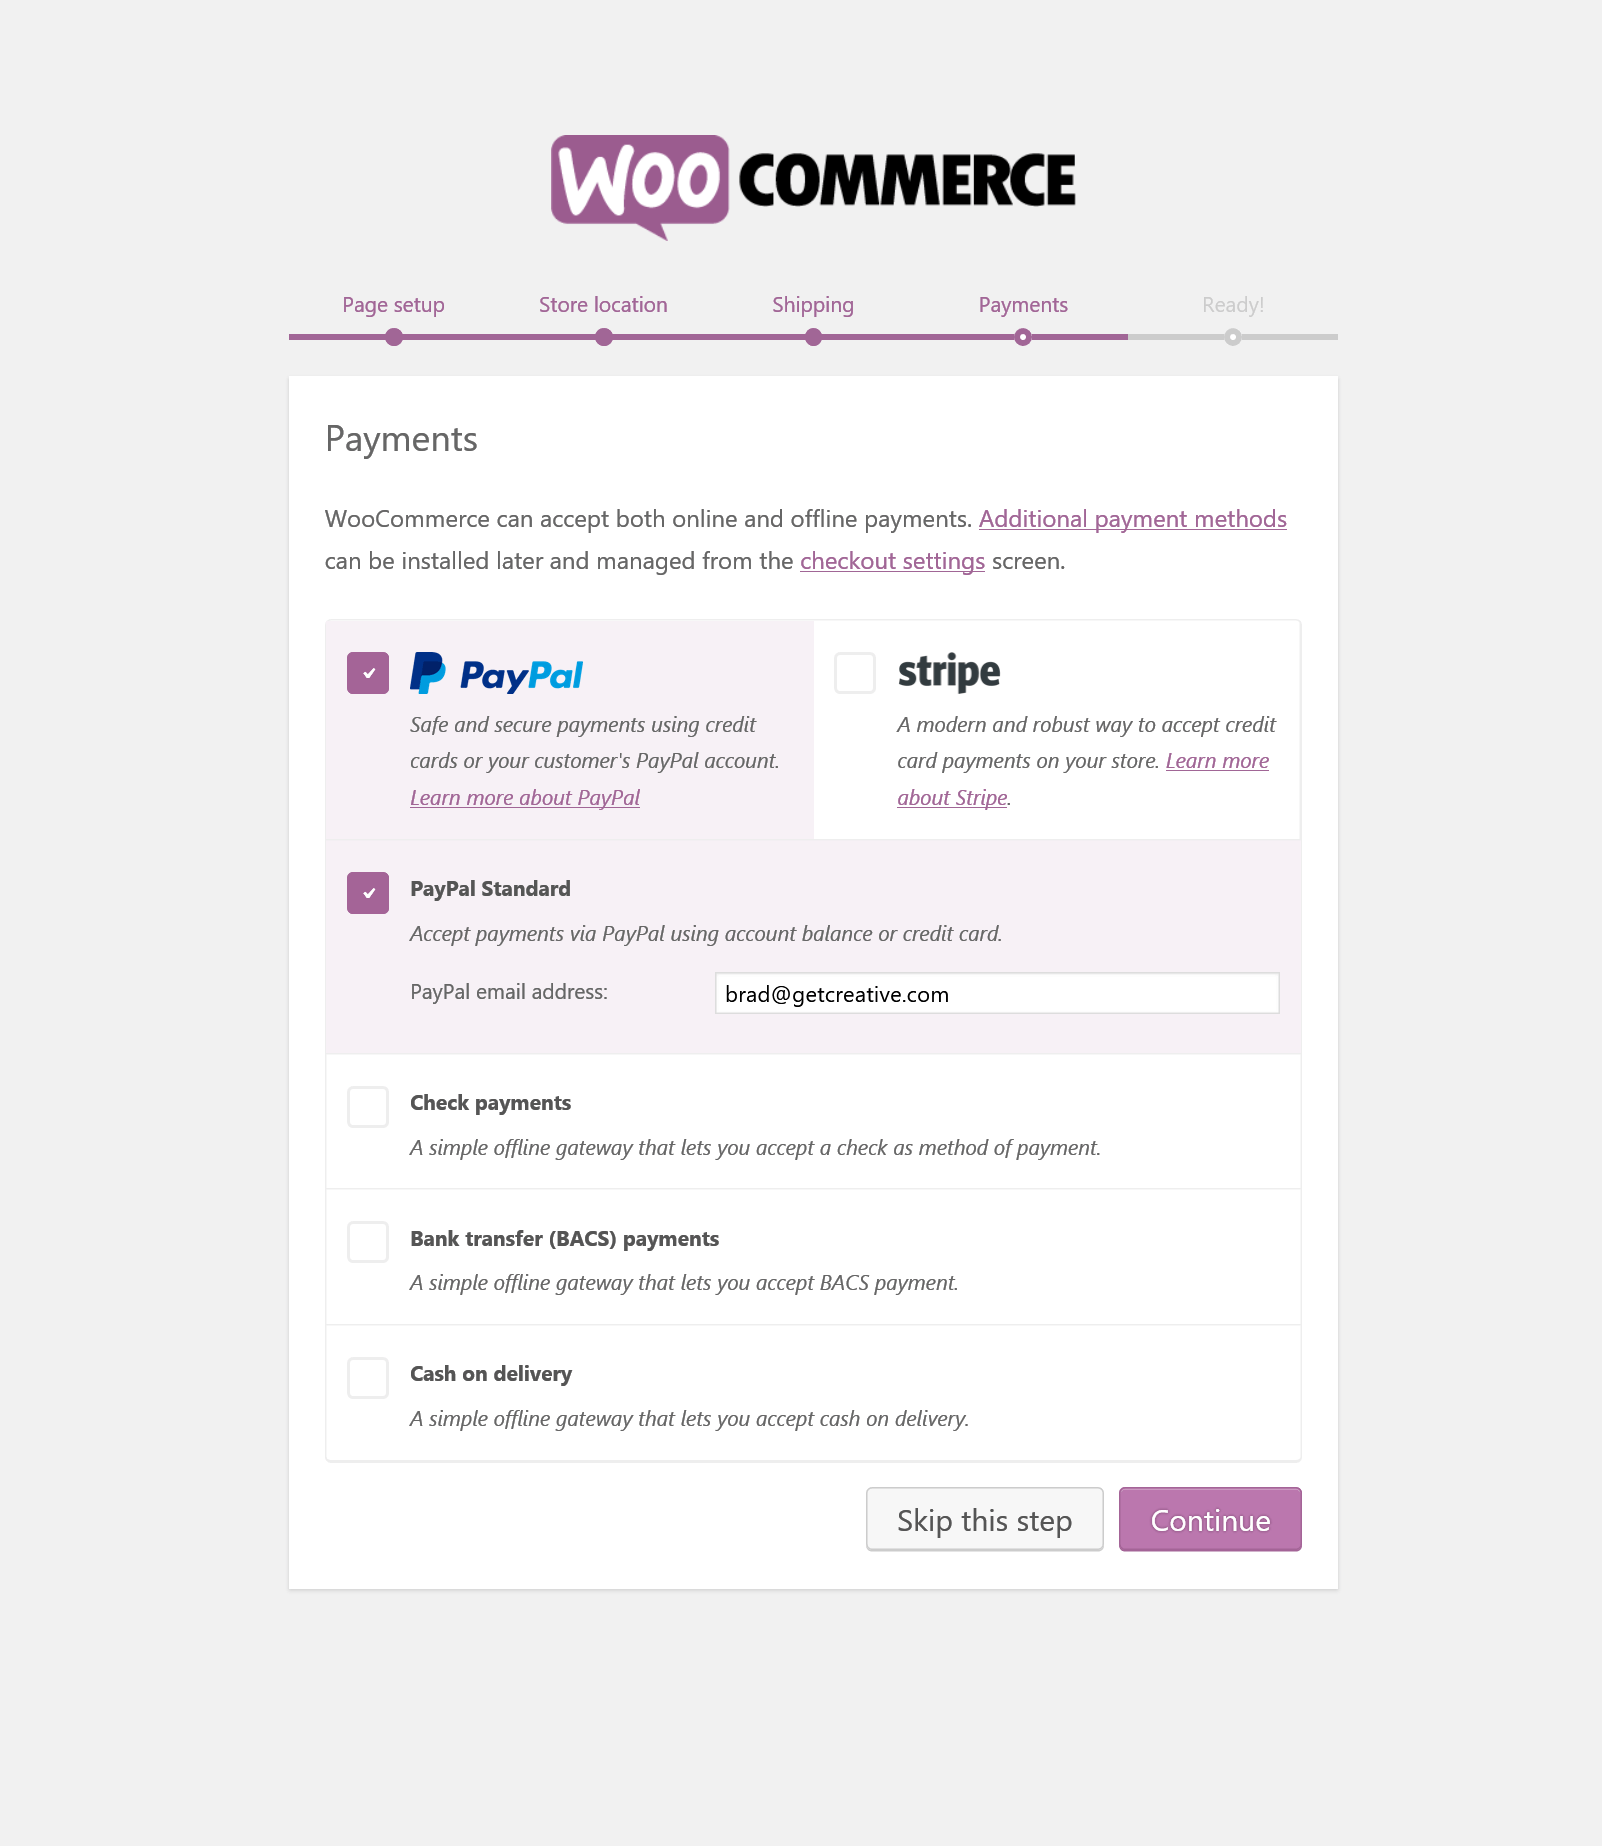
Of course, you’ll need to sign up with the provider of your choice before you can enter your account details in the WooCommerce payment settings screen.
Click the Continue. WooCommerce will ask your permission to collect non-sensitive diagnostic data. Make your selection to complete the Quick Start Wizard.
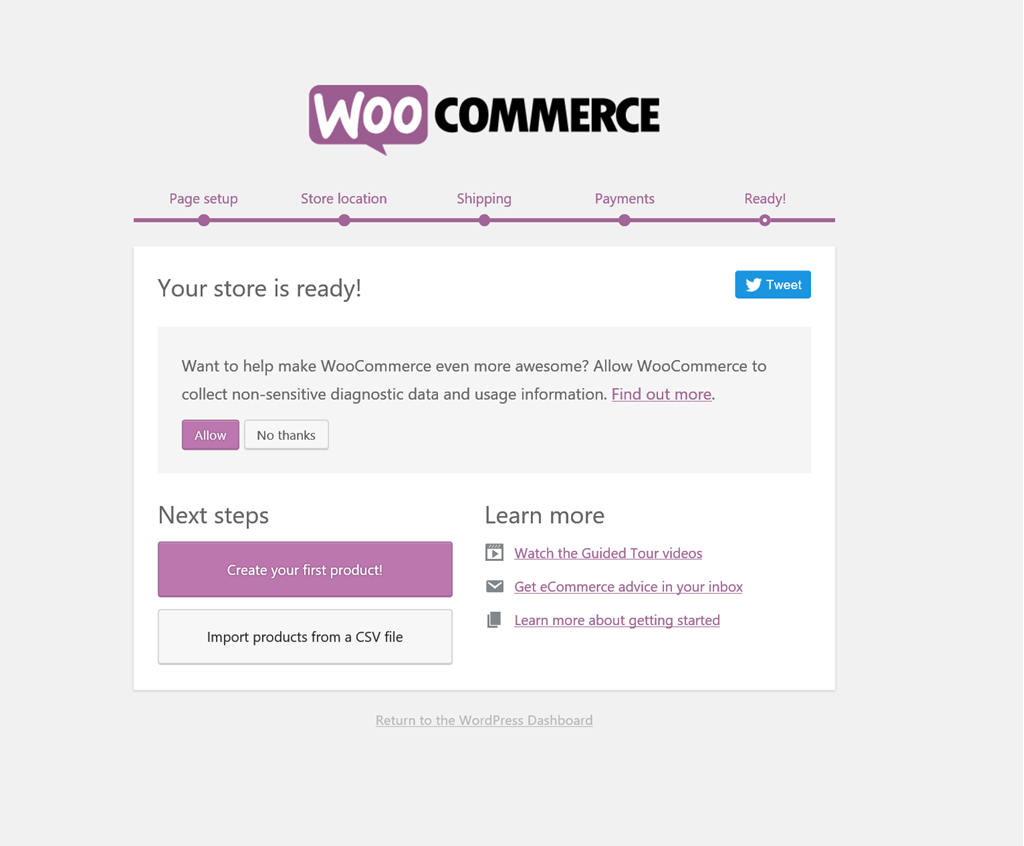
You can now add products to your store but, before you do that, we encourage you to take a step back to see how WooCommerce integrates with WordPress. To do so, select the Return to the WordPress Dashboard link at the bottom of the page.
Configuring your online store structure
Your basic features being now set up, let’s check other settings that could optimize your configuration. From the sidebar, go to WooCommerce > Settings.
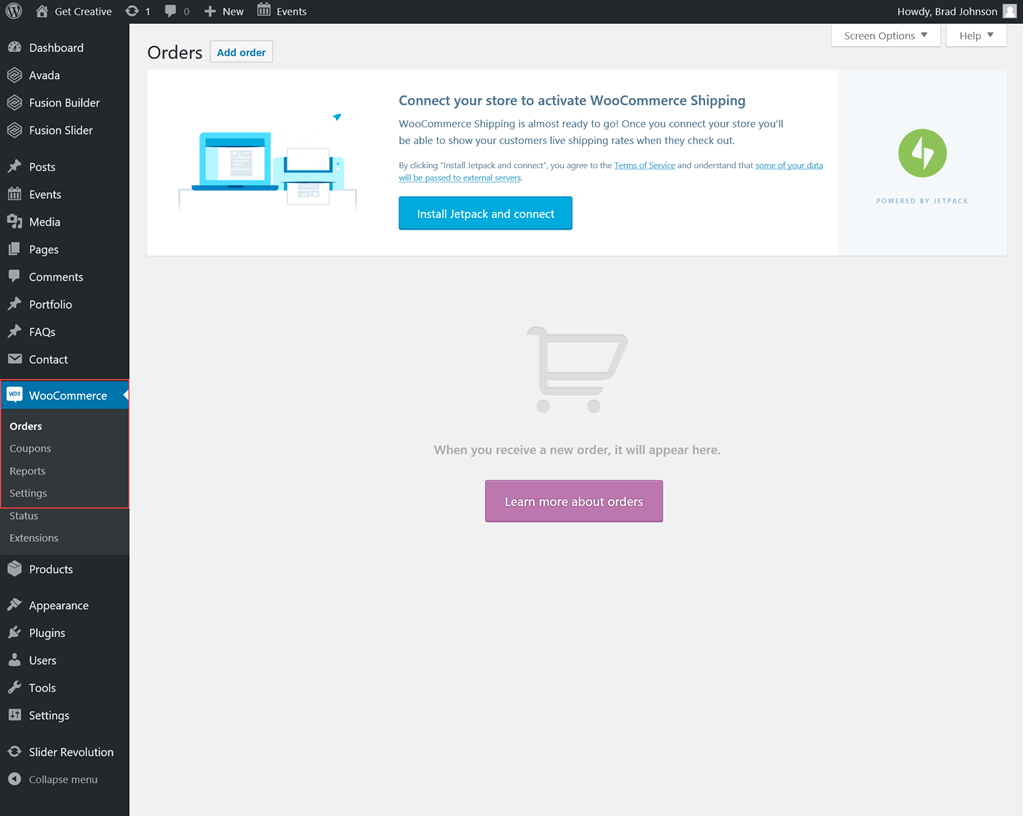
Depending on your WordPress configuration, the first thing you’ll see is that WooCommerce requires a Jetpack connection to activate its Shipping module. Jetpack is a free WordPress plugin offering many extended features. If you haven’t done so before, you’ll now need to install and connect your WordPress installation to Jetpack. Click Install Jetpack and connect to proceed.
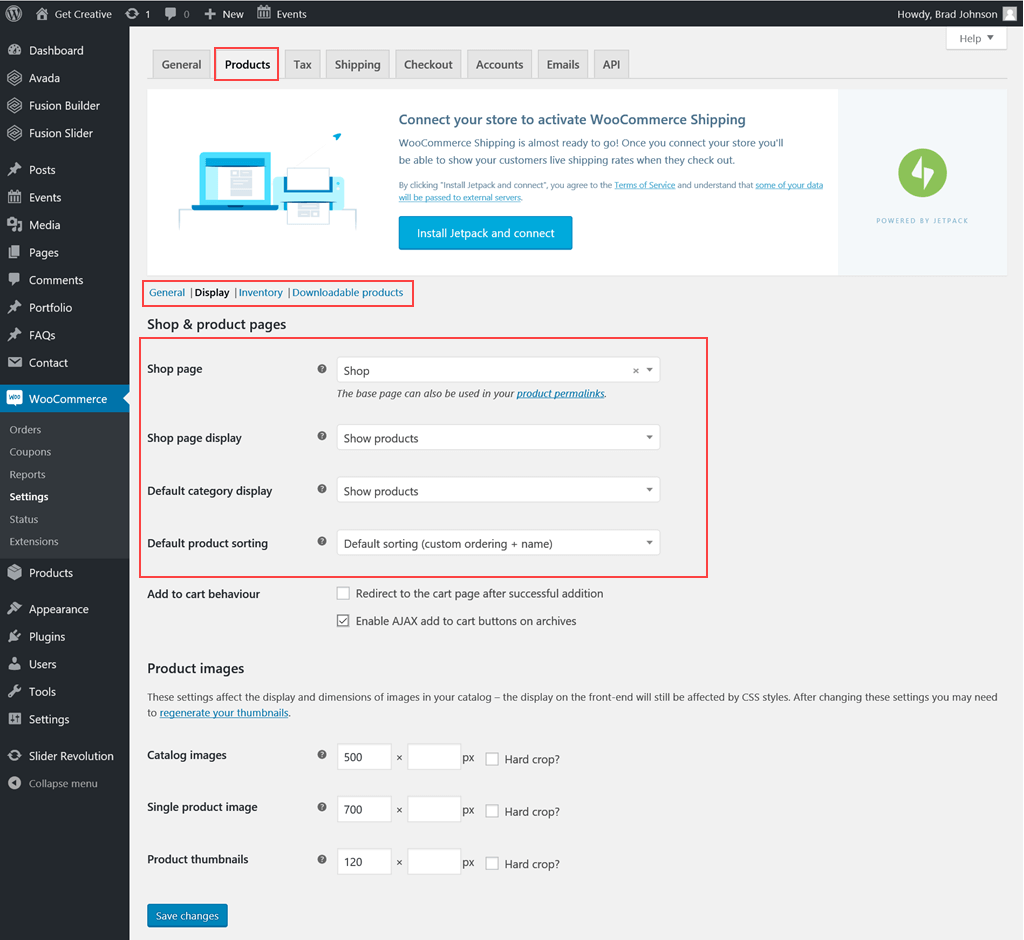
Once that’s done, continue browsing the WooCommerce Settings tabs: General, Products, Tax, Shipping, Checkout, Accounts, Emails and API.

You can go through each settings page when you see fit, but first click the Products tab and then the Display sub-tab to check your Shop & product pages settings. By default, the Shop page dropdown menu it is set to Shop. If you want a different name for your storefront – for example, “My store” – click Pages in the sidebar and rename it.
While in the Pages section, check out the other default WooCommerce pages – Cart, Checkout and My account.
Back in the Products > Display tab of the WooCommerce Settings menu, look underneath the Shop Page menu for a link to your Product Permalink settings.
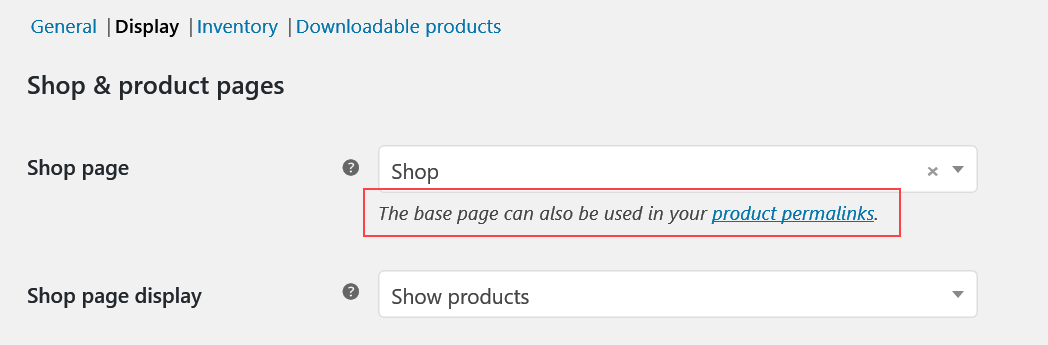
Permalinks are your WordPress’ blog posts, categories and shop permanent URLs. They’re important for search engine optimization and they make it easier for others to link to your web pages. Because of that, you should make them as simple and descriptive as possible.
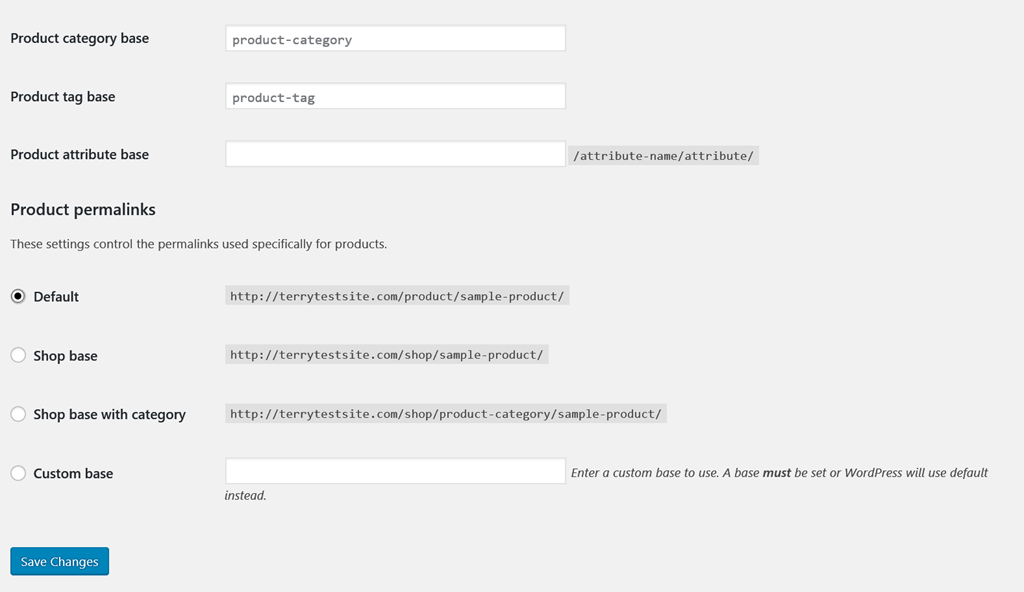
The default permalinks should be OK, but you can customize your settings as you like.
Configuring the general store settings
Let’s now see the rest of WooCommerce Settings, starting with the General tab. You’ve seen most of these settings in the Quick Start Wizard, but this is your chance to further tweak your location, shipping and currency settings.
Setting the product module
As we saw earlier, the Products page offers several sub-tabs : General settings (to change measurement settings and enable/disable product reviews), Display (to define default product sorting and image sizes), Inventory (covering stock management settings) and Downloadable products.
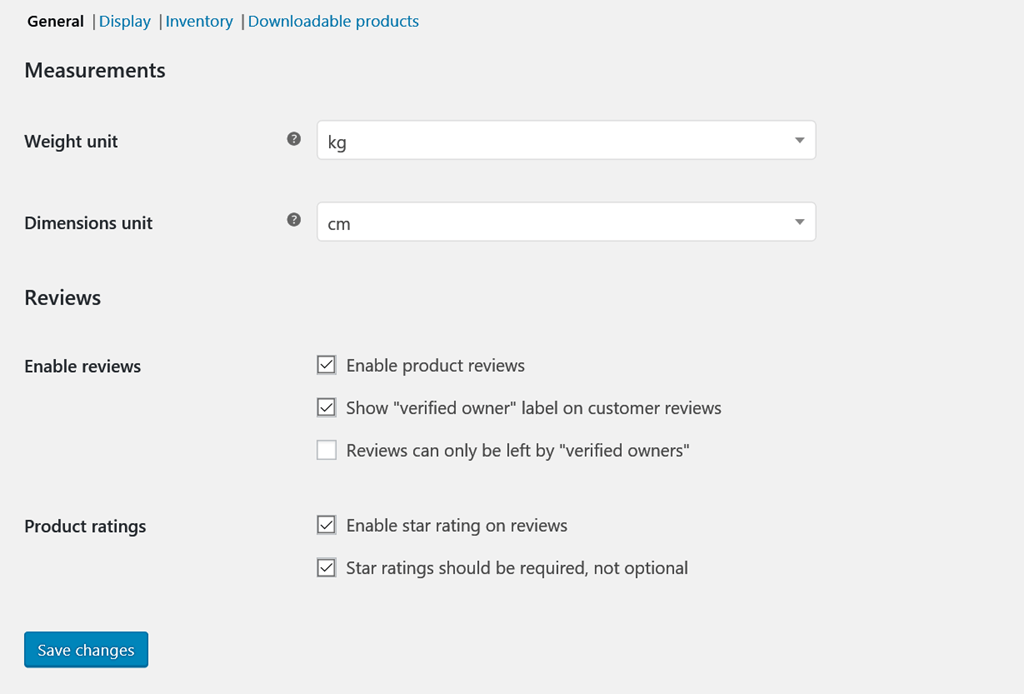
Depending on the type of eCommerce store and your operational preferences, most of the settings here are very straightforward. For more information on specific features, see the WooCommerce knowledge base.
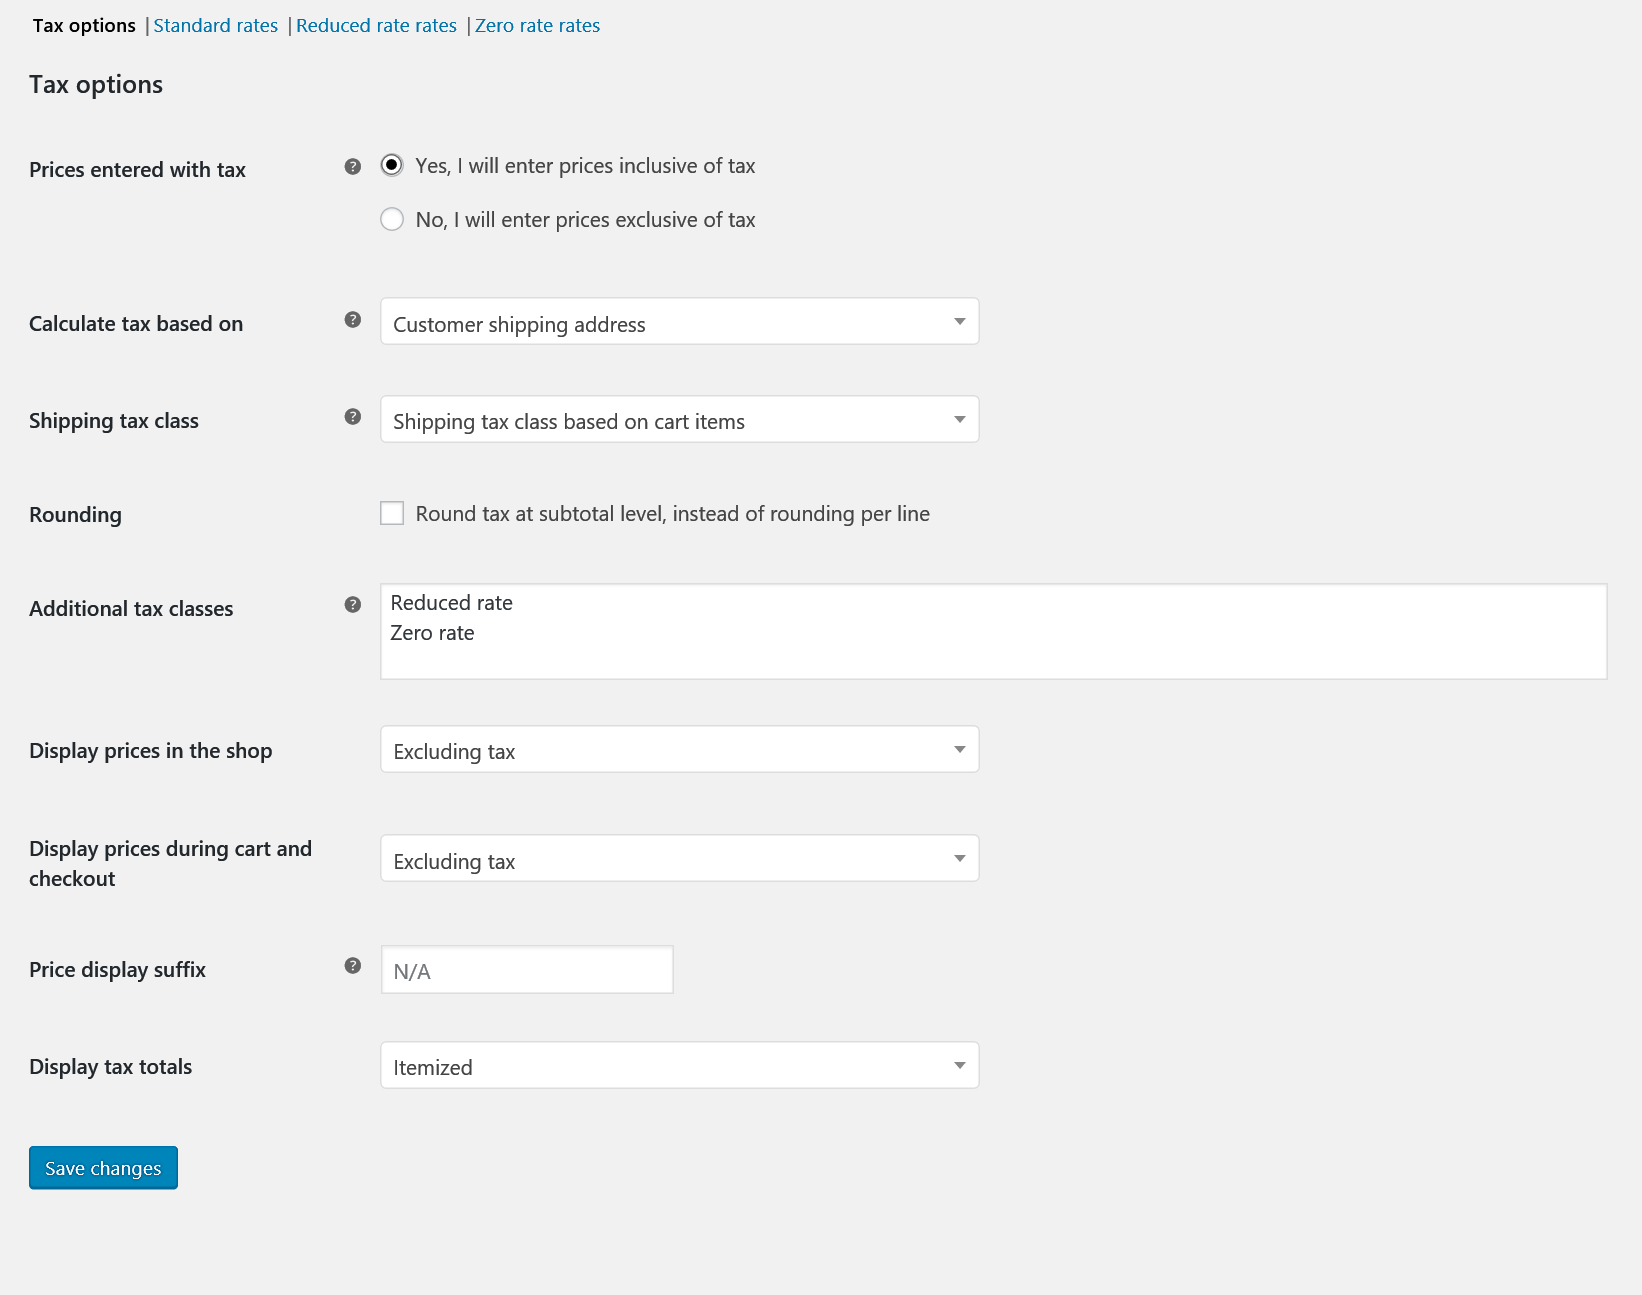
Setting the tax module
While basic tax settings were configured during the installation, the tax settings pages allow you to tailor your store at a granular level: for example, choosing whether the tax is calculated based on the customer’s billing or shipping address, adding zero rate tax categories, defining how tax is itemized at checkout and more.
Setting the shipping module
If you sell physical goods, spend some time configuring your Shipping settings.
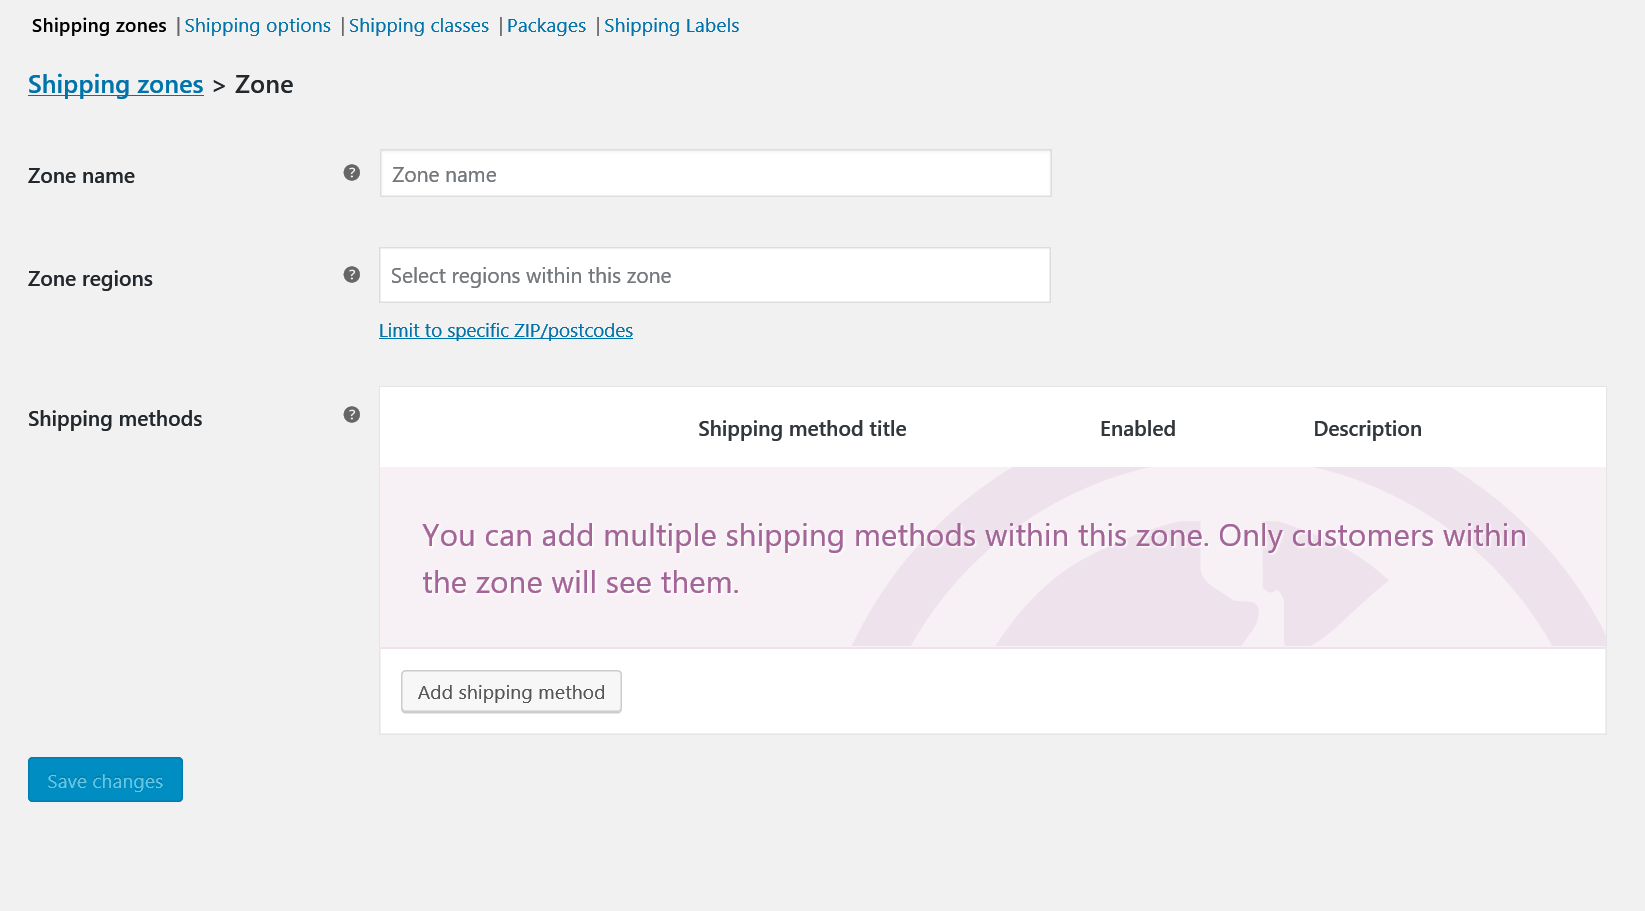
Define the countries and regions eligible for shipping, add and manage shipping classes, manage shipping labels and so on. Remember that WooCommerce’s shipping relies on a WordPress connection to the Jetpack plugin.
Setting the checkout module
This module aims at configuring your customers’ payment experience. Important settings include: enabling/disabling discount coupons, support for guest checkout, defining shopping cart and checkout pages, payment gateway and much more.
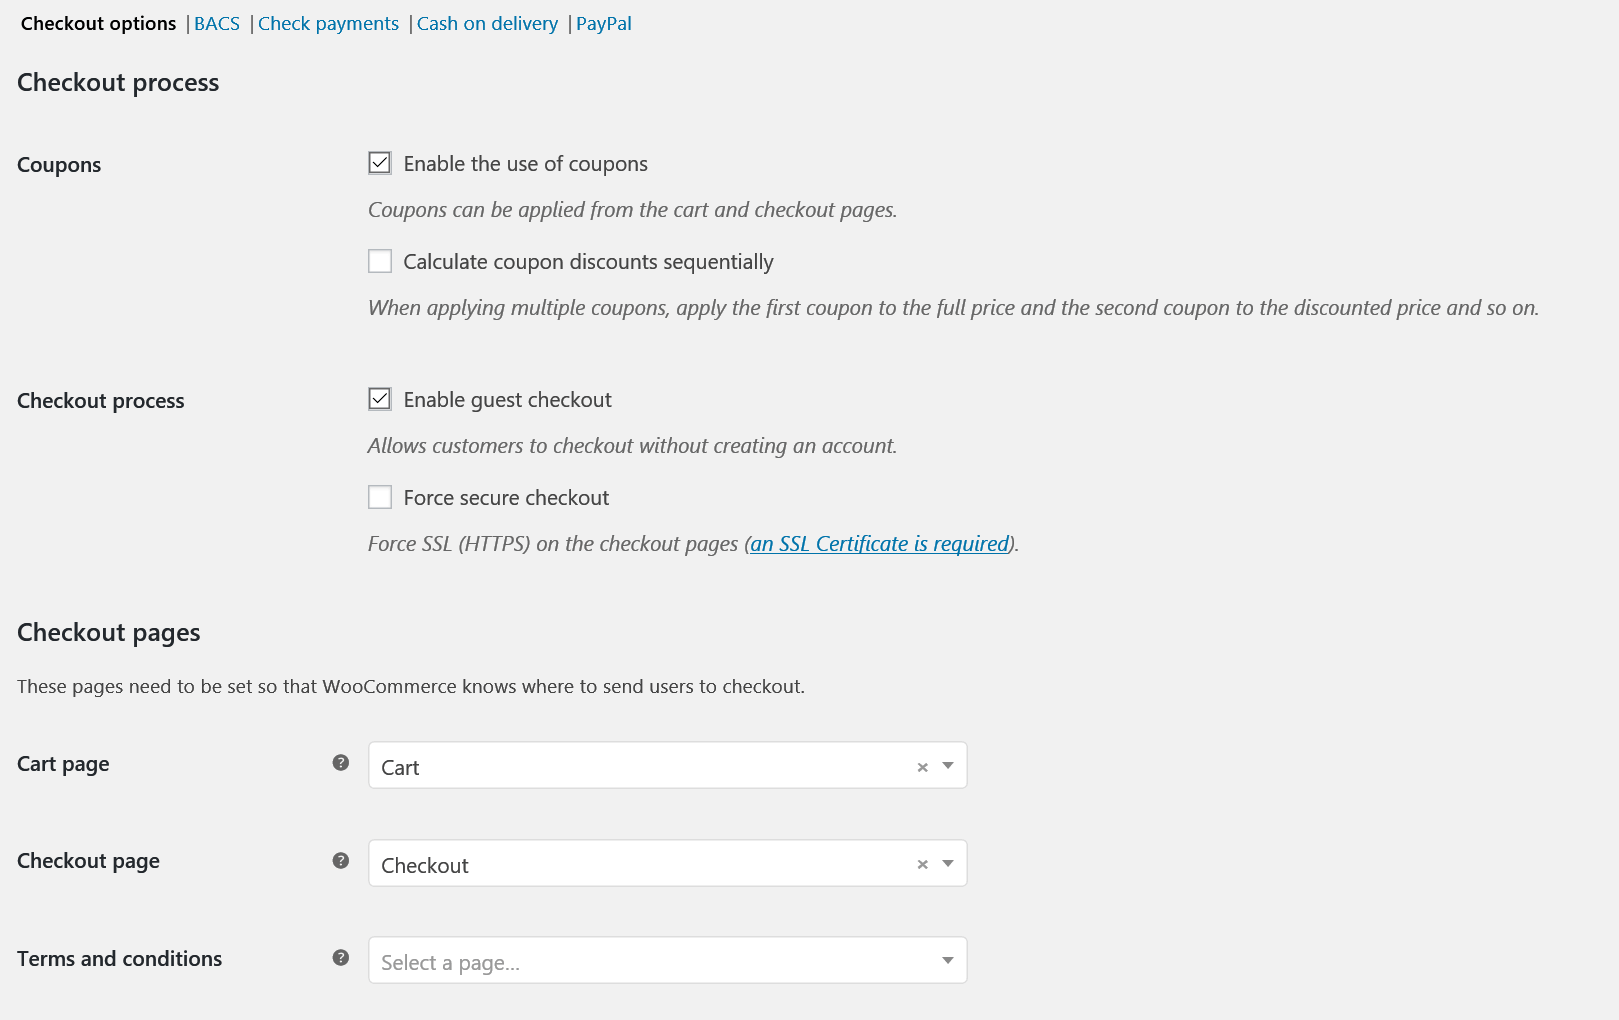
This is also where you can configure API keys or passwords to connect your store to your payment gateway accounts. As you add gateways to your store, expect to see dedicated sub-tabs appear in the Checkout section.
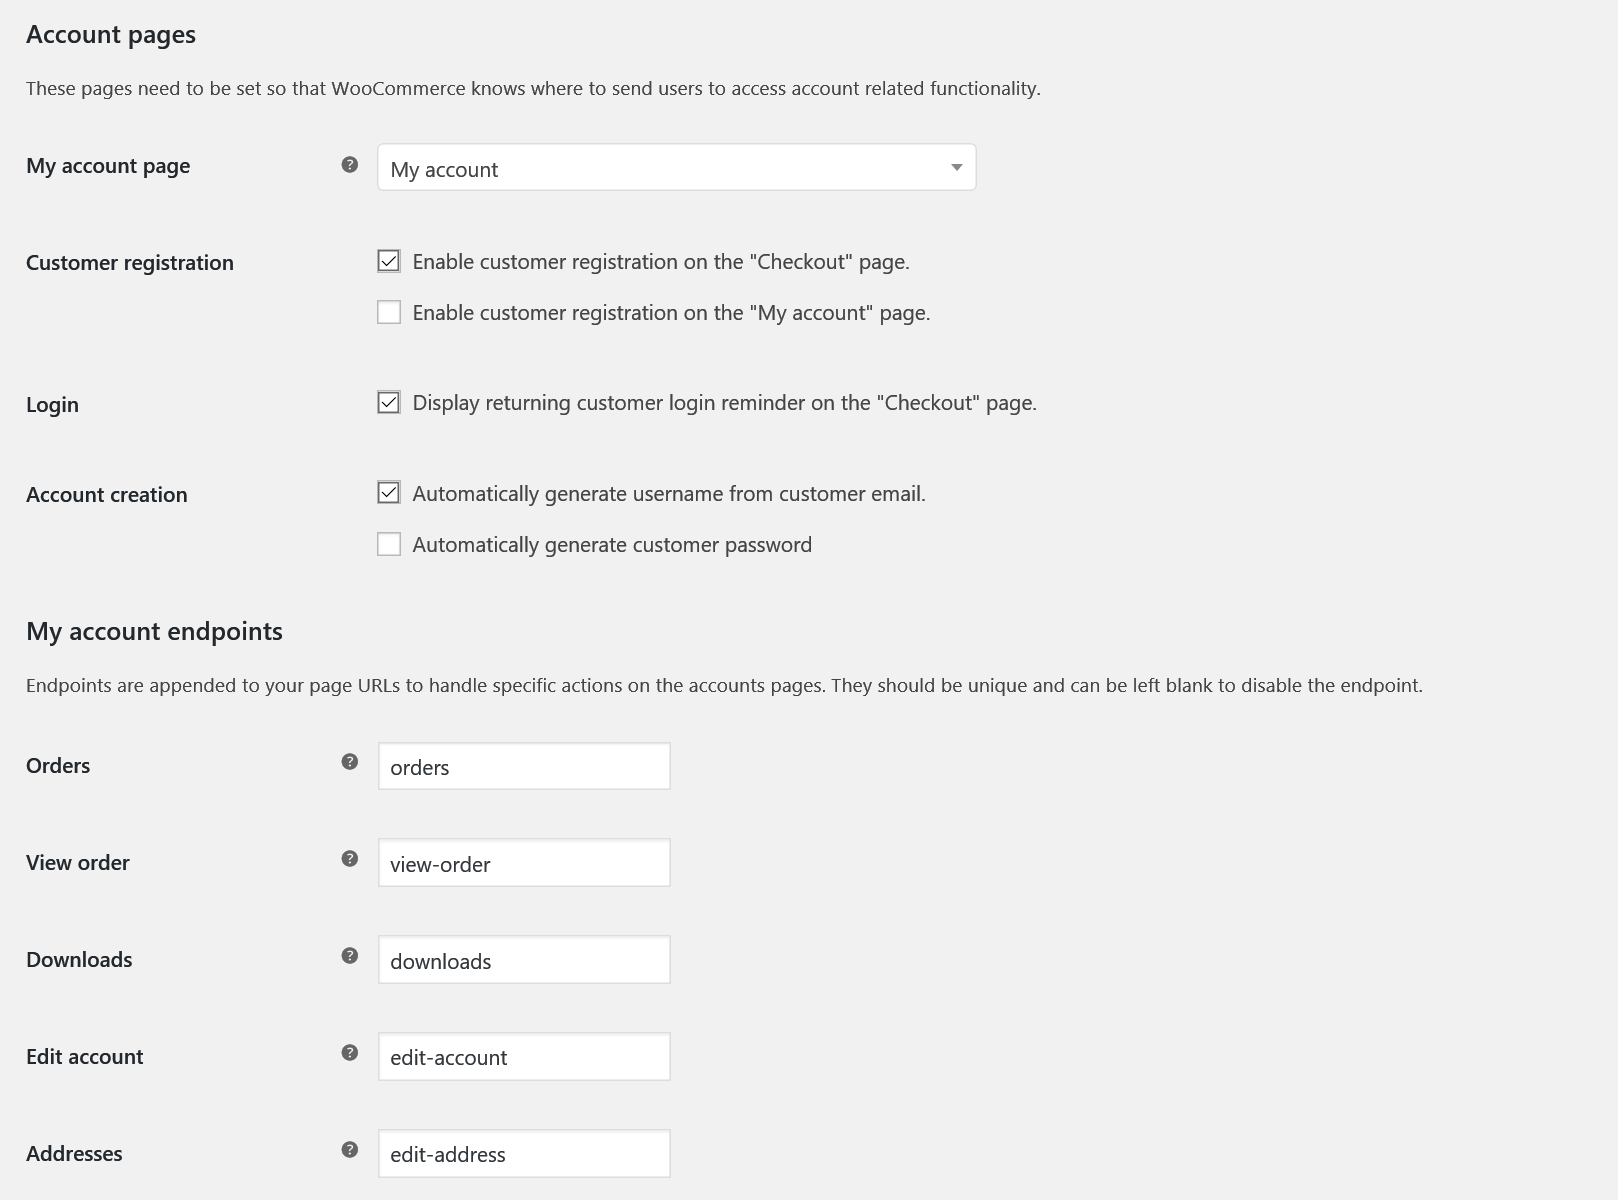
Setting the account module
This module allows you to configure store features such as customer registration, account creation parameters and URL endpoints for specific account pages. Again, although default settings are sufficient to get you up and running, you should configure them further in order to optimize your customers’ experience.
Setting the email module
The Email module is where you’ll customize your customer communications: modify the standard templates for a wide range of automatically generated communications, including order confirmations, cancelled or failed orders, order refunds, invoices and more.
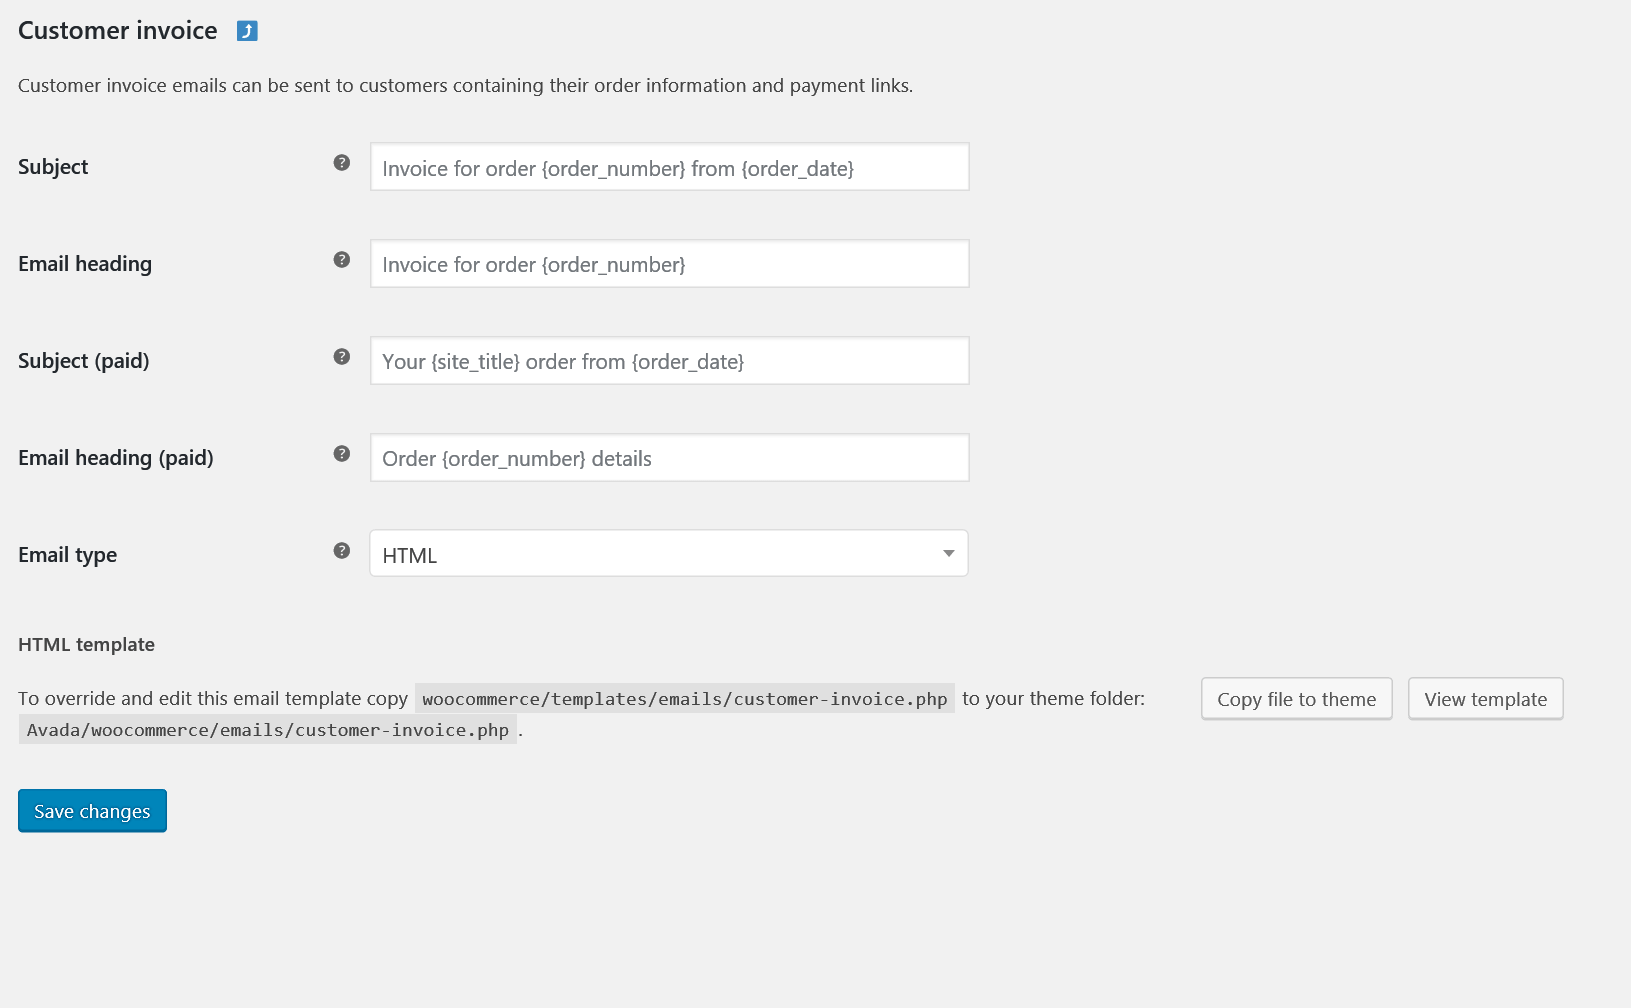
This is also where you can define the “From” and “Reply to” settings for your store-generated emails.
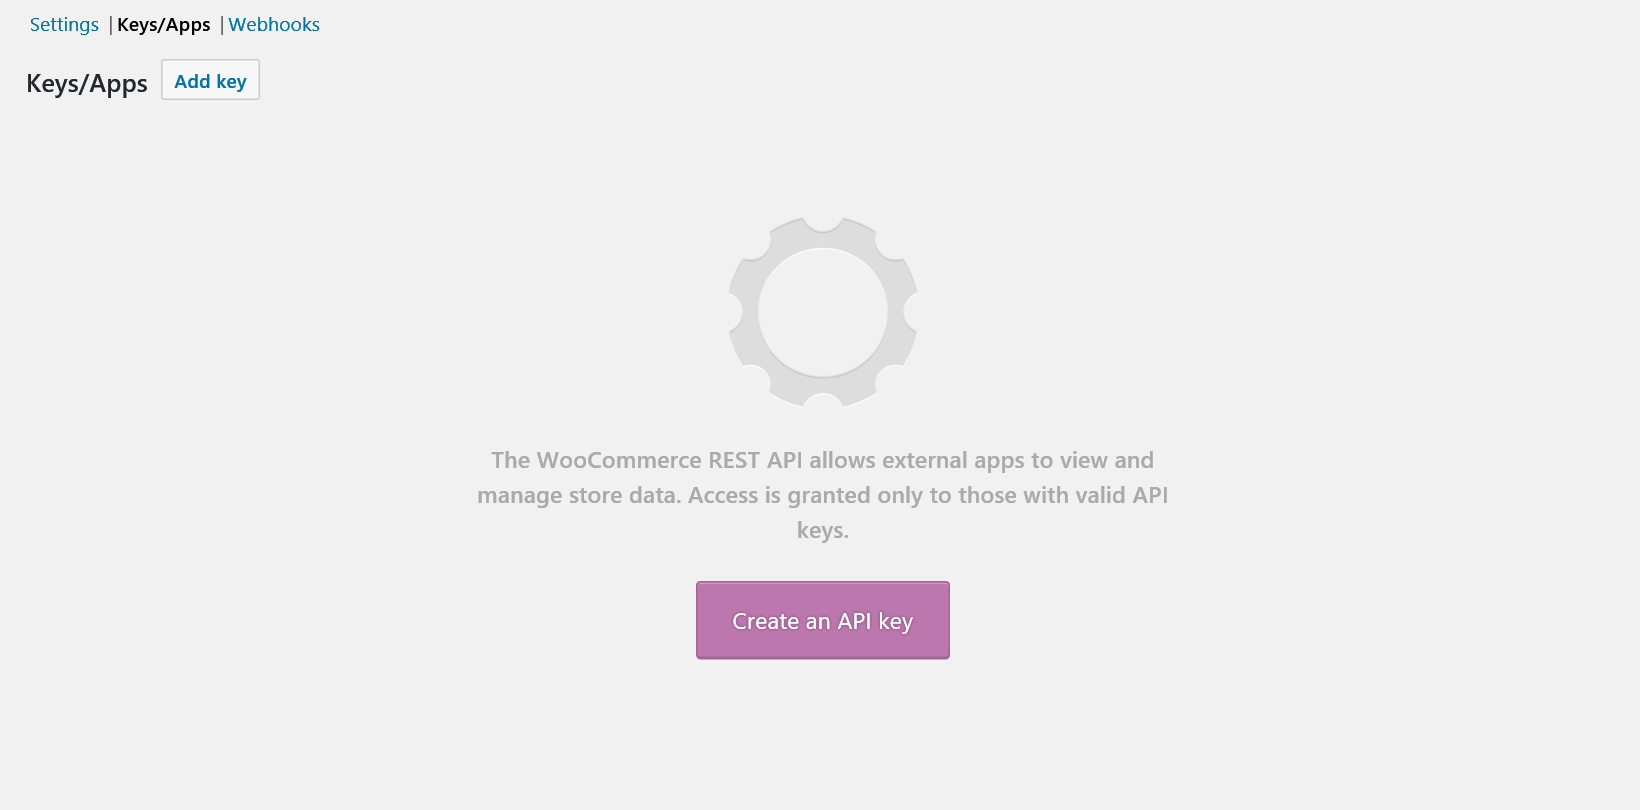
Setting the API
Finally, the API Settings menu allows you to provide access for external apps to view and manage your store’s data.
Designing your store
While you can create your store’s design from scratch, it would be far easier to use WordPress Themes that specifically support WooCommerce. The plugin supports a free theme called Storefront that you install from the WordPress Themes section.

There is also a large number of free and premium WordPress themes available online. Check out repositories like Theme Forest.
Extending WooCommerce with third-party addons
One of the main reasons for WooCommerce’s success is the explosion in third-party extensions created for it. If you’re not fully satisfied with some of WooCommerce’s core features, head to WooCommerce > Extensions in the WordPress sidebar and check for alternatives.
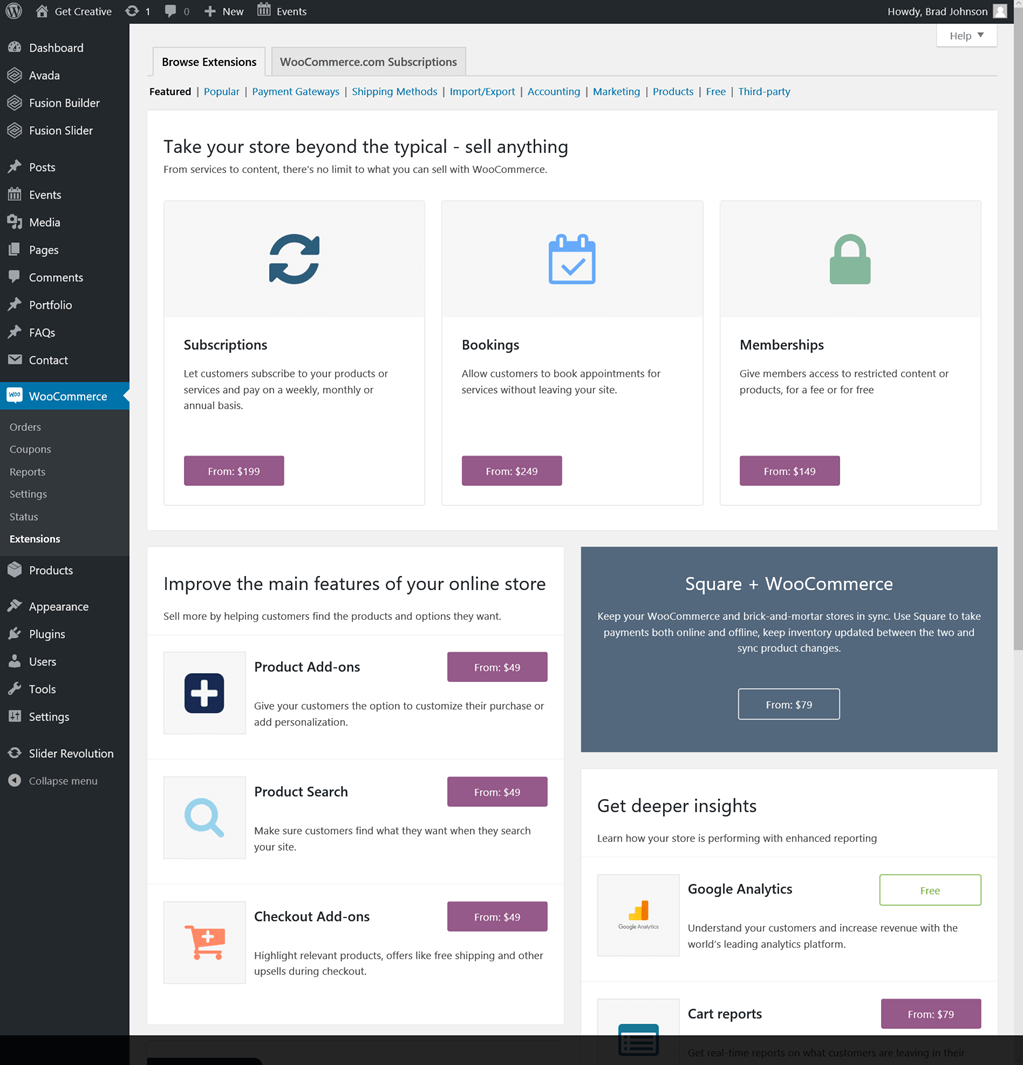
From payment gateway extensions and shipping modules through accounting plugins and new sales and marketing features, you’ll find a host of goodies on offer – most of which will require payment.
Check out the WooCommerce knowledge base for more details, but for further questions or if you need help, please open a support ticket from your HostPapa Dashboard. Follow this link to learn how.
